|
C-Menu 0.2.9
A User Interface Toolkit
|
|
C-Menu 0.2.9
A User Interface Toolkit
|
The following is a very brief introduction to the C-Menu Toolkit and only covers a very tiny fraction of its features and capabilities. For more detailed information, please refer to the html documentation at:
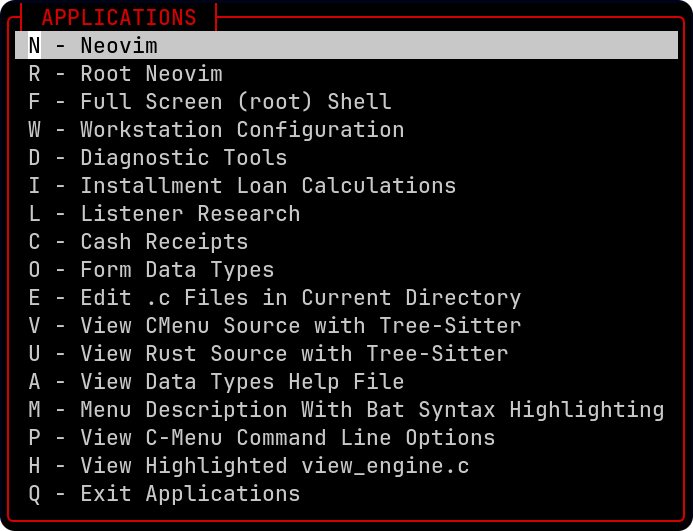
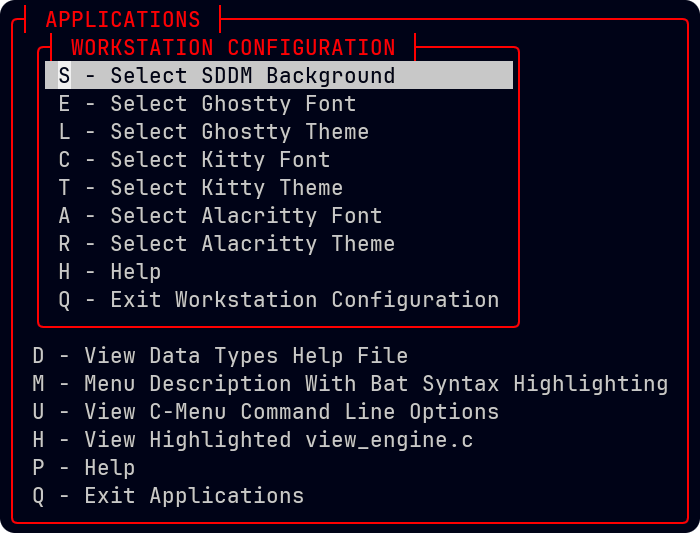
With the C-Menu Toolkit, you can quickly and easily develop menu-driven user interfaces to give your applications a professional look and feel. The main components are:
Menu - Hierarchical menus
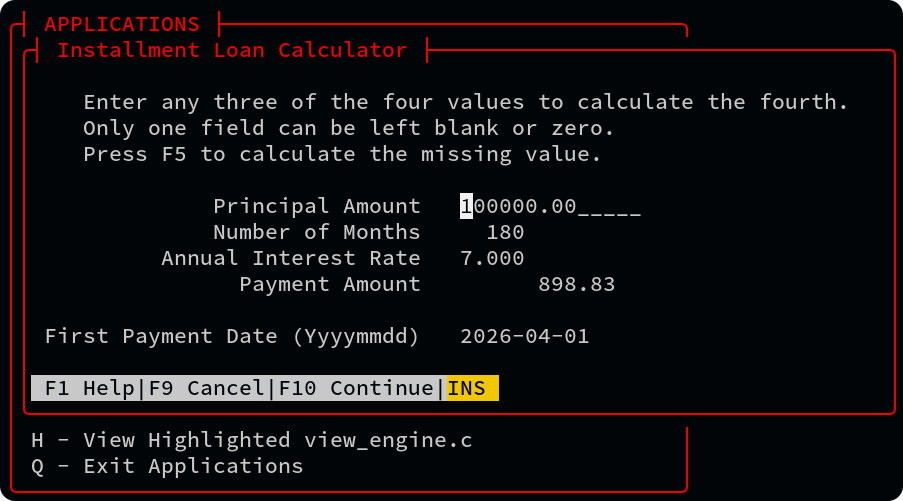
Form - On-screen forms for entering, editing, validating, processing, and submitting data. Notice the chyron at the bottom of the screen, which provides helpful instructions and feedback to the user. Of course, all C-Menu components provide navigation by mouse and keyboard, and in many cases by the standard h, j, k, and l keys that programmers are accustomed to.
Pick - Lists objects for user selection
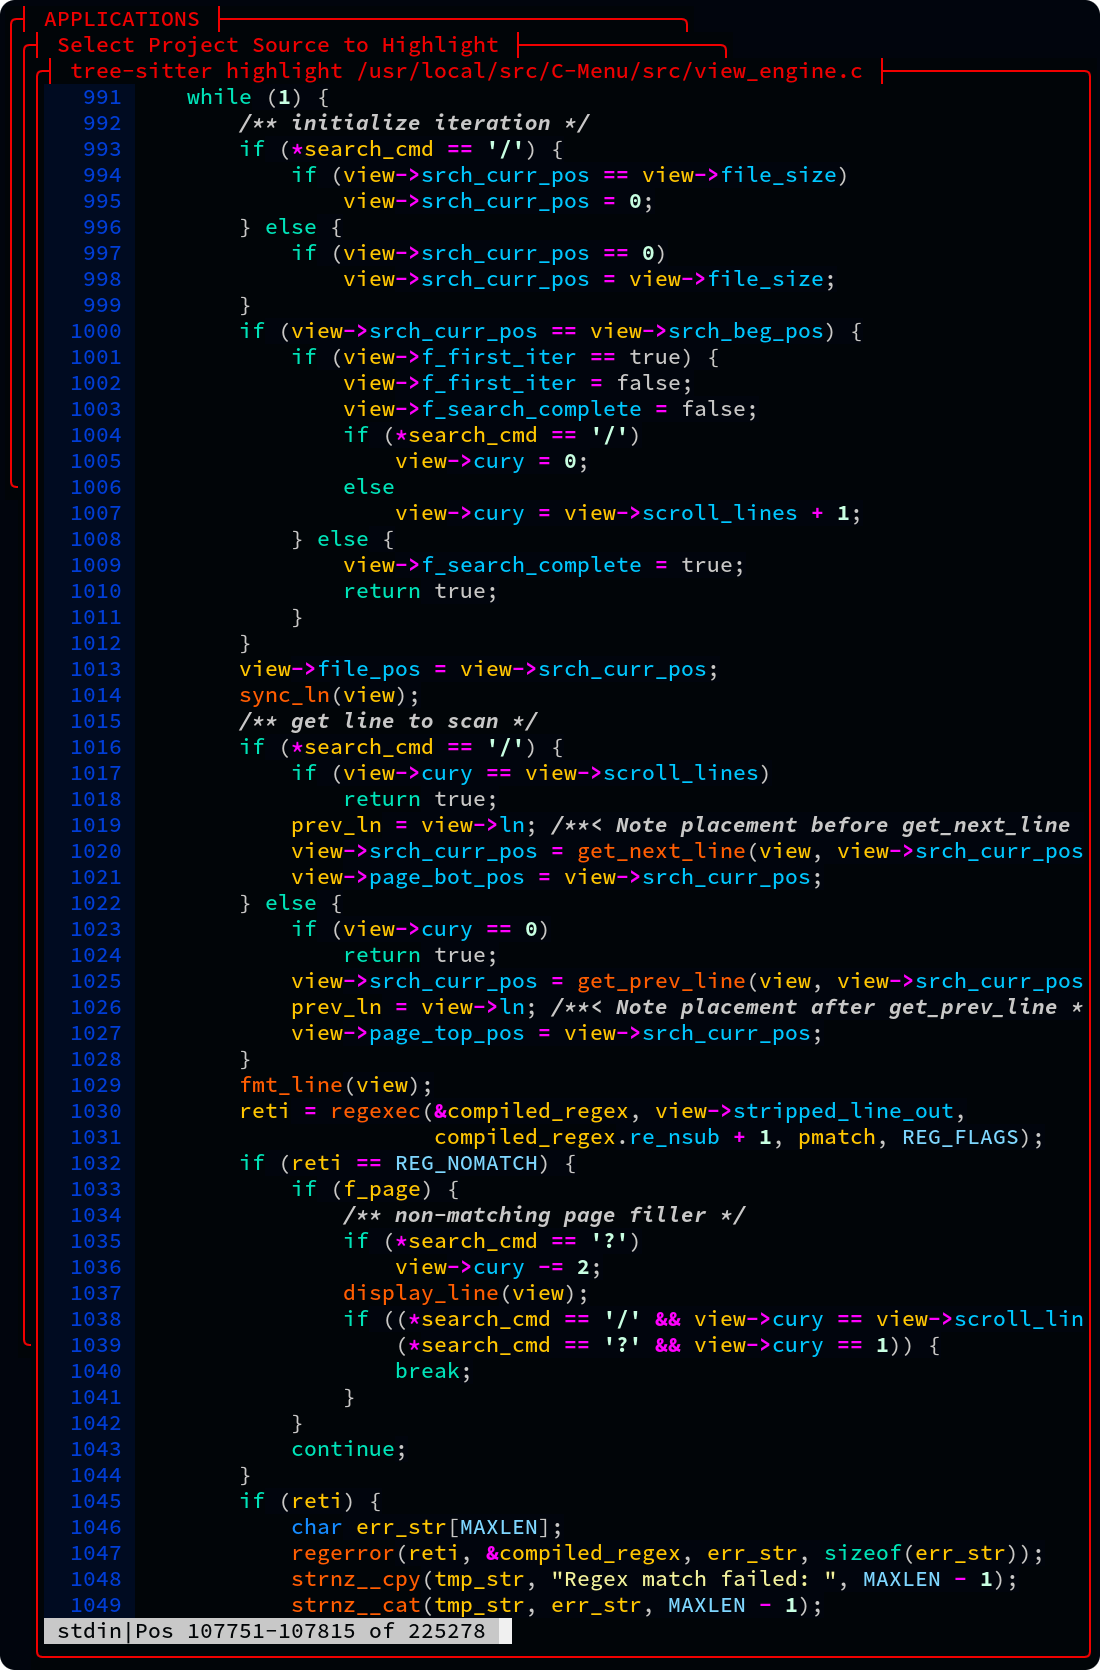
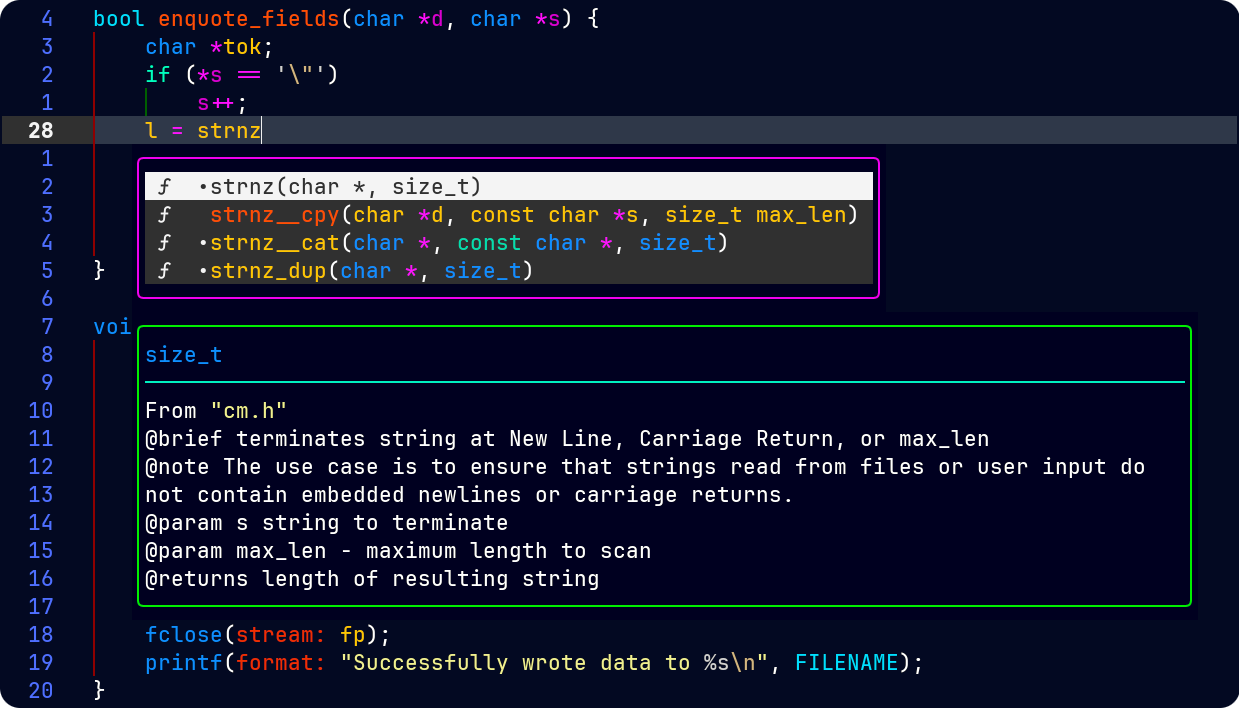
View - A pager for viewing large files with highlighting, Unicode support, line numbering, regular expression searching and a large virtual pad for horizontal scrolling. View works great with tree-sitter, source-highlight, pygments, bat, manual pages, and other syntax highlighters. It can strip the ansi codes from files for convenient editing.
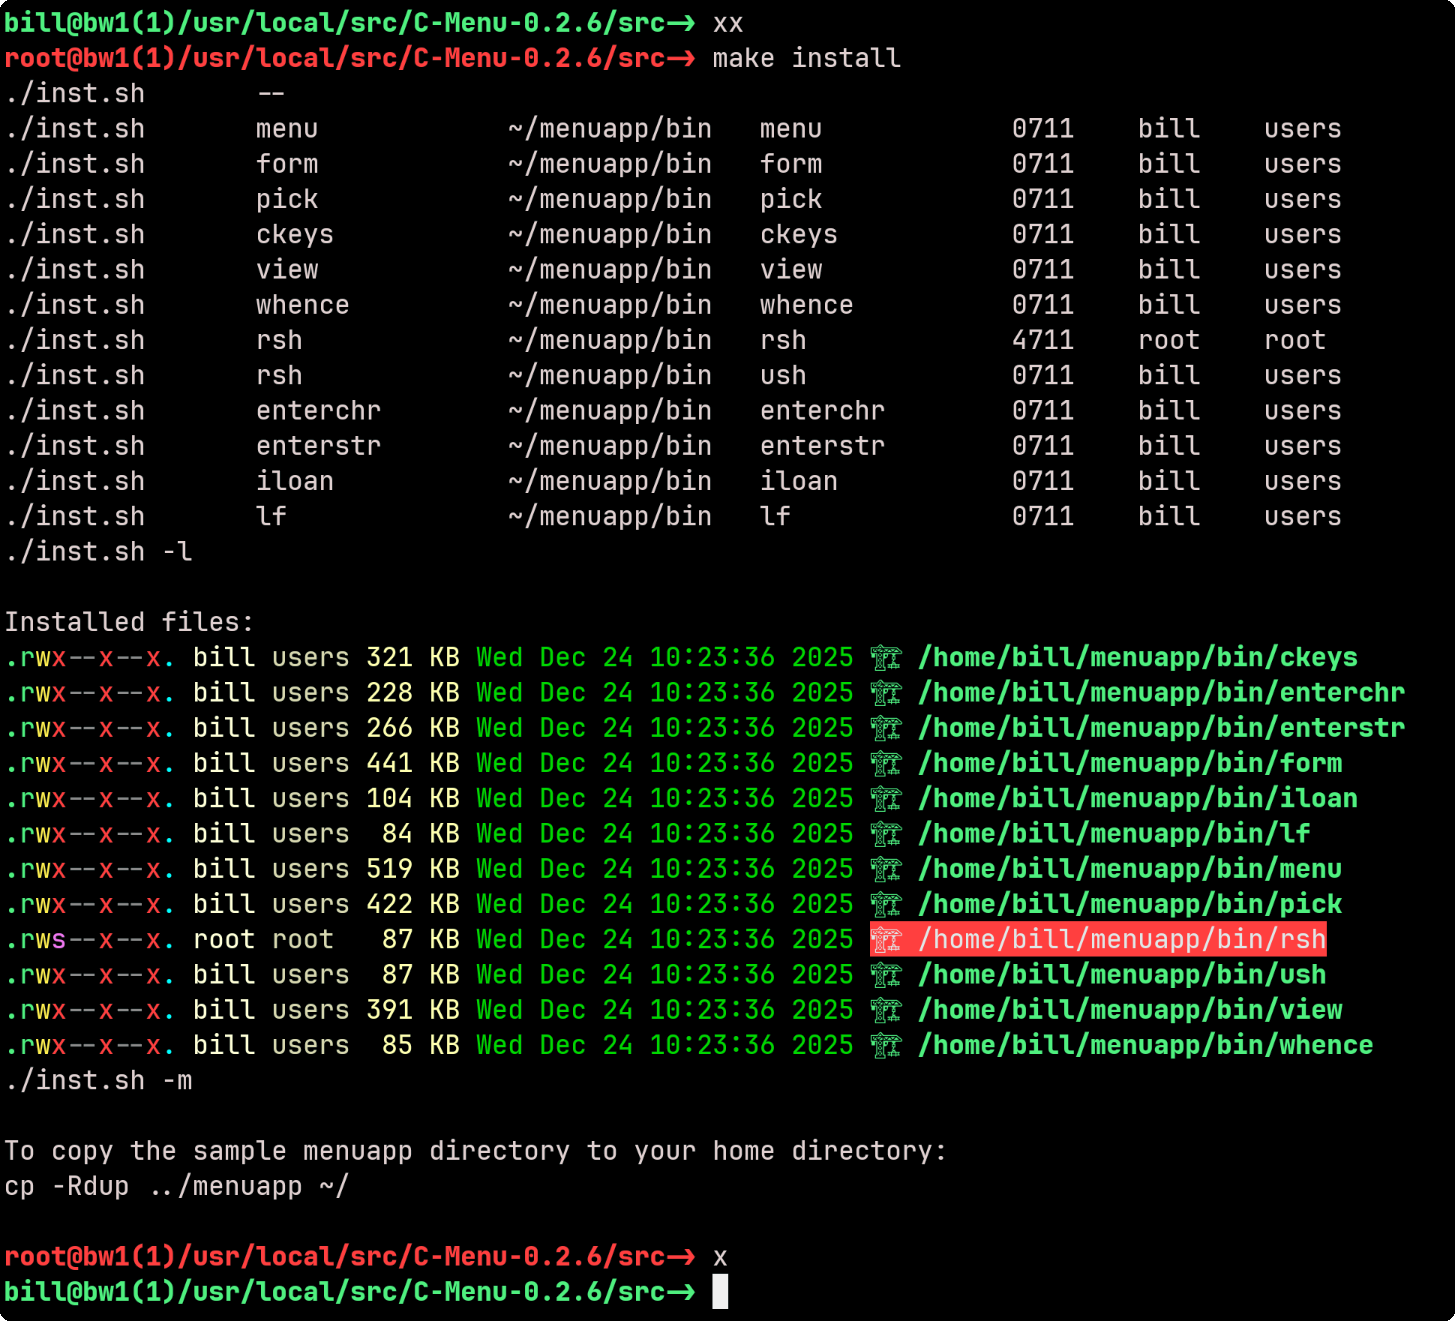
RSH - RSH provides an alternative to su and sudo for executing commands with elevated privileges. It allows developers and system administrators to get in and out of root shells and execute commands with root privileges without the need for a password, for example, by authenticating with an ssh key as you do on gethub.
In the following example, make install requires root privilege, so the user types xx, is authenticated with an ssh key, and then types make install. When the make install is finished, the user types x to exit the root shell and relinquish root privilege.
lf - A "regular expression" file finder that's a smaller, easier-to-use, and much faster alternative to the Unix find command. The following is an actual benchmark of execution times for lf and find. The find and lf commands, approximate common usage, and produce identical results.
Verify that the output files are identical:
The results show that lf is about 35% faster than find in this benchmark, and the output files are identical.
Next, we will add "-exec ls -l {} \;", a common use of find, and see how that affects performance. The resulting benchmarks are so extreme, they may strain credulity at first, but they are real and easily reproducible. Just run lf and find commands on your system in a variety of directories.
CAUTION: A simple mistake such as forgetting to include the -a option for lf may give lf an unfair advantage because lf omits hidden files and directories by default. Therefore, you must examine the number of files found to verify the accuracy of the benchmark.

API - A C library that provides a simple and consistent interface for creating menu-driven user interfaces in C. The API includes tools specific to C-Menu, but also many general purpose tools that can be used in a wide range of applications. The API documentation is available in html and integrated into Neovim's completion engine, making it easy for developers to learn and use the API effectively.
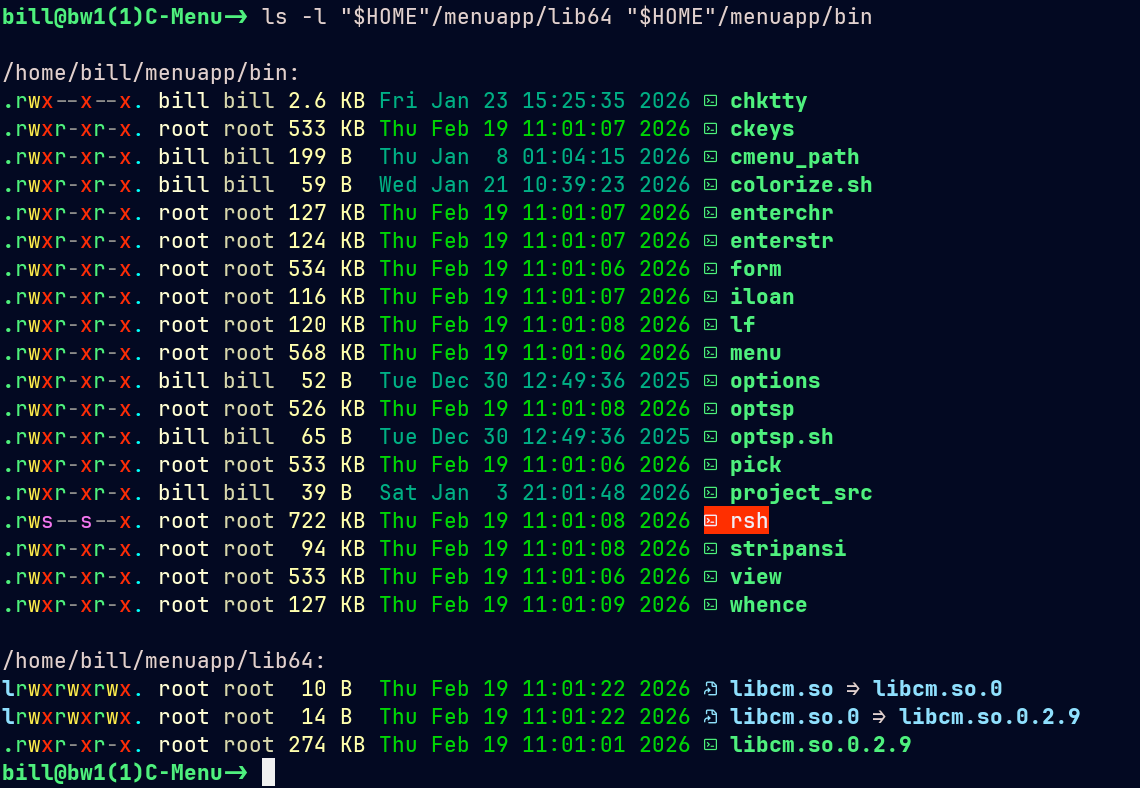
All of the C-Menu binaries, including executables and libcm.so are less than 350k, a tiny footprint for such powerful tools, and no GUI is required. The only dependencies are the GNU C Library, GNU Math Library, NCursesw, and a terminal emulator. That makes C-Menu especially well suited for rescue, embedded, server, development, and other resource-constrained environments, where the overhead of a graphical user interface would be counter-productive.
Oh, and C-Menu is free, distributed under the MIT License.
Are you ready to get started? Below, you will find several options for installing C-Menu on your Linux system. I haven't yet provided a packaged binary distribution, but that will be coming soon in version 0.3.0.
Choose the option that best suits your needs and follow the instructions to get C-Menu up and running on your system.
This will create a directory named menuapp containing the extracted files.
Prepend the C-Menu bin directory to your PATH environment variable by adding the following line to your shell profile (e.g., ~/.bashrc or ~/.zshrc). Assuming you extracted the menuapp directory to your home directory, the line would look like this:
2️⃣ Copy the menuapp directory to your desired location:
C-Menu uses dynamic linking by default, but if you plan to use rsh in a rescue environment where dynamic linking may not be available, you can statically link rsh during the build. To do this, set the RSH_LD environment variable to -static before building C-Menu:
CMake or Makefile will strip symbols from the executable once it has been copied to its destination directory. This is done to reduce the size of the executable and improve performance.
NOTE If you choose to statically link rsh, make sure that your C compiler and linker support static linking and that you have the necessary static libraries, specifically, libc.a, installed on your system. Static linking can increase the size of the executable and may have implications for compatibility and security, so be sure to test the statically linked version of C-Menu in your target environment.
Most distributions provide static libraries for the GNU C Library (glibc) as part of their development packages. You may need to install additional packages to obtain these static libraries, such as glibc-static or libc6-dev for glibc.
1️⃣ Navigate to the C-Menu/src directory, create a build directory, and cd into it:
2️⃣ Configure the project using CMake, specifying the installation prefix and build type:
3️⃣ Build the project using:
4️⃣ . If you want to use rsh in setuid mode, you must install C-Menu with root privileges.
go to Finish the installation below to complete the installation process.
1️⃣ Navigate to the C-Menu/build directory and run the provided build script:
2️⃣ Assume root privileges to install C-Menu:
go to Finish the installation below to complete the installation process.
1️⃣ . Navigate to the C-Menu/src directory and edit the provided Makefile to set the installation PREFIX to your desired location (e.g., /home/yourusername/menuapp):
2️⃣ Build the project using:
3️⃣ Assume root privileges to install C-Menu:
Continue with Finish the installation below to complete the installation process.
1️⃣ Vrify that the C-Menu libraries and binaries have been installed to the correct directories (e.g., /home/yourusername/menuapp/lib64 and /home/yourusername/menuapp/bin) and that the permissions are set correctly.
2️⃣ Register the C-Menu libraries with the dynamic linker by running the following command:
3️⃣ Add the C-Menu bin directory to your PATH environment variable by adding the following line to your shell profile (e.g., ~/.bashrc or ~/.zshrc):
(replace /home/yourusername with the actual path to your menuapp directory) and save the file. 😆
4️⃣ Copy the sample minitrc from the C-Menu/menuapp directory to your home directory:
5️⃣ Edit the ~/.minitrc file to customize your C-Menu configuration as needed.
6️⃣ Source your shell profile to apply the changes to your PATH:
7️⃣ Start C-Menu by running the following command in your terminal: