 |
C-Menu 0.2.9
A User Interface Toolkit
|
|
C-Menu 0.2.9
A User Interface Toolkit
|
All of C-Menu's long options, shown as, –option_name, in the following ../screen can be can be set on the command line or in the C-Menu configuration file, ~/.minitrc. The "--" prefix is omitted in the configuration file. Options commonly used on the command line also have a single-letter short option equivalent. Command line options override configuration file options, allowing you to customize the behavior of your applications on a per-instance basis.
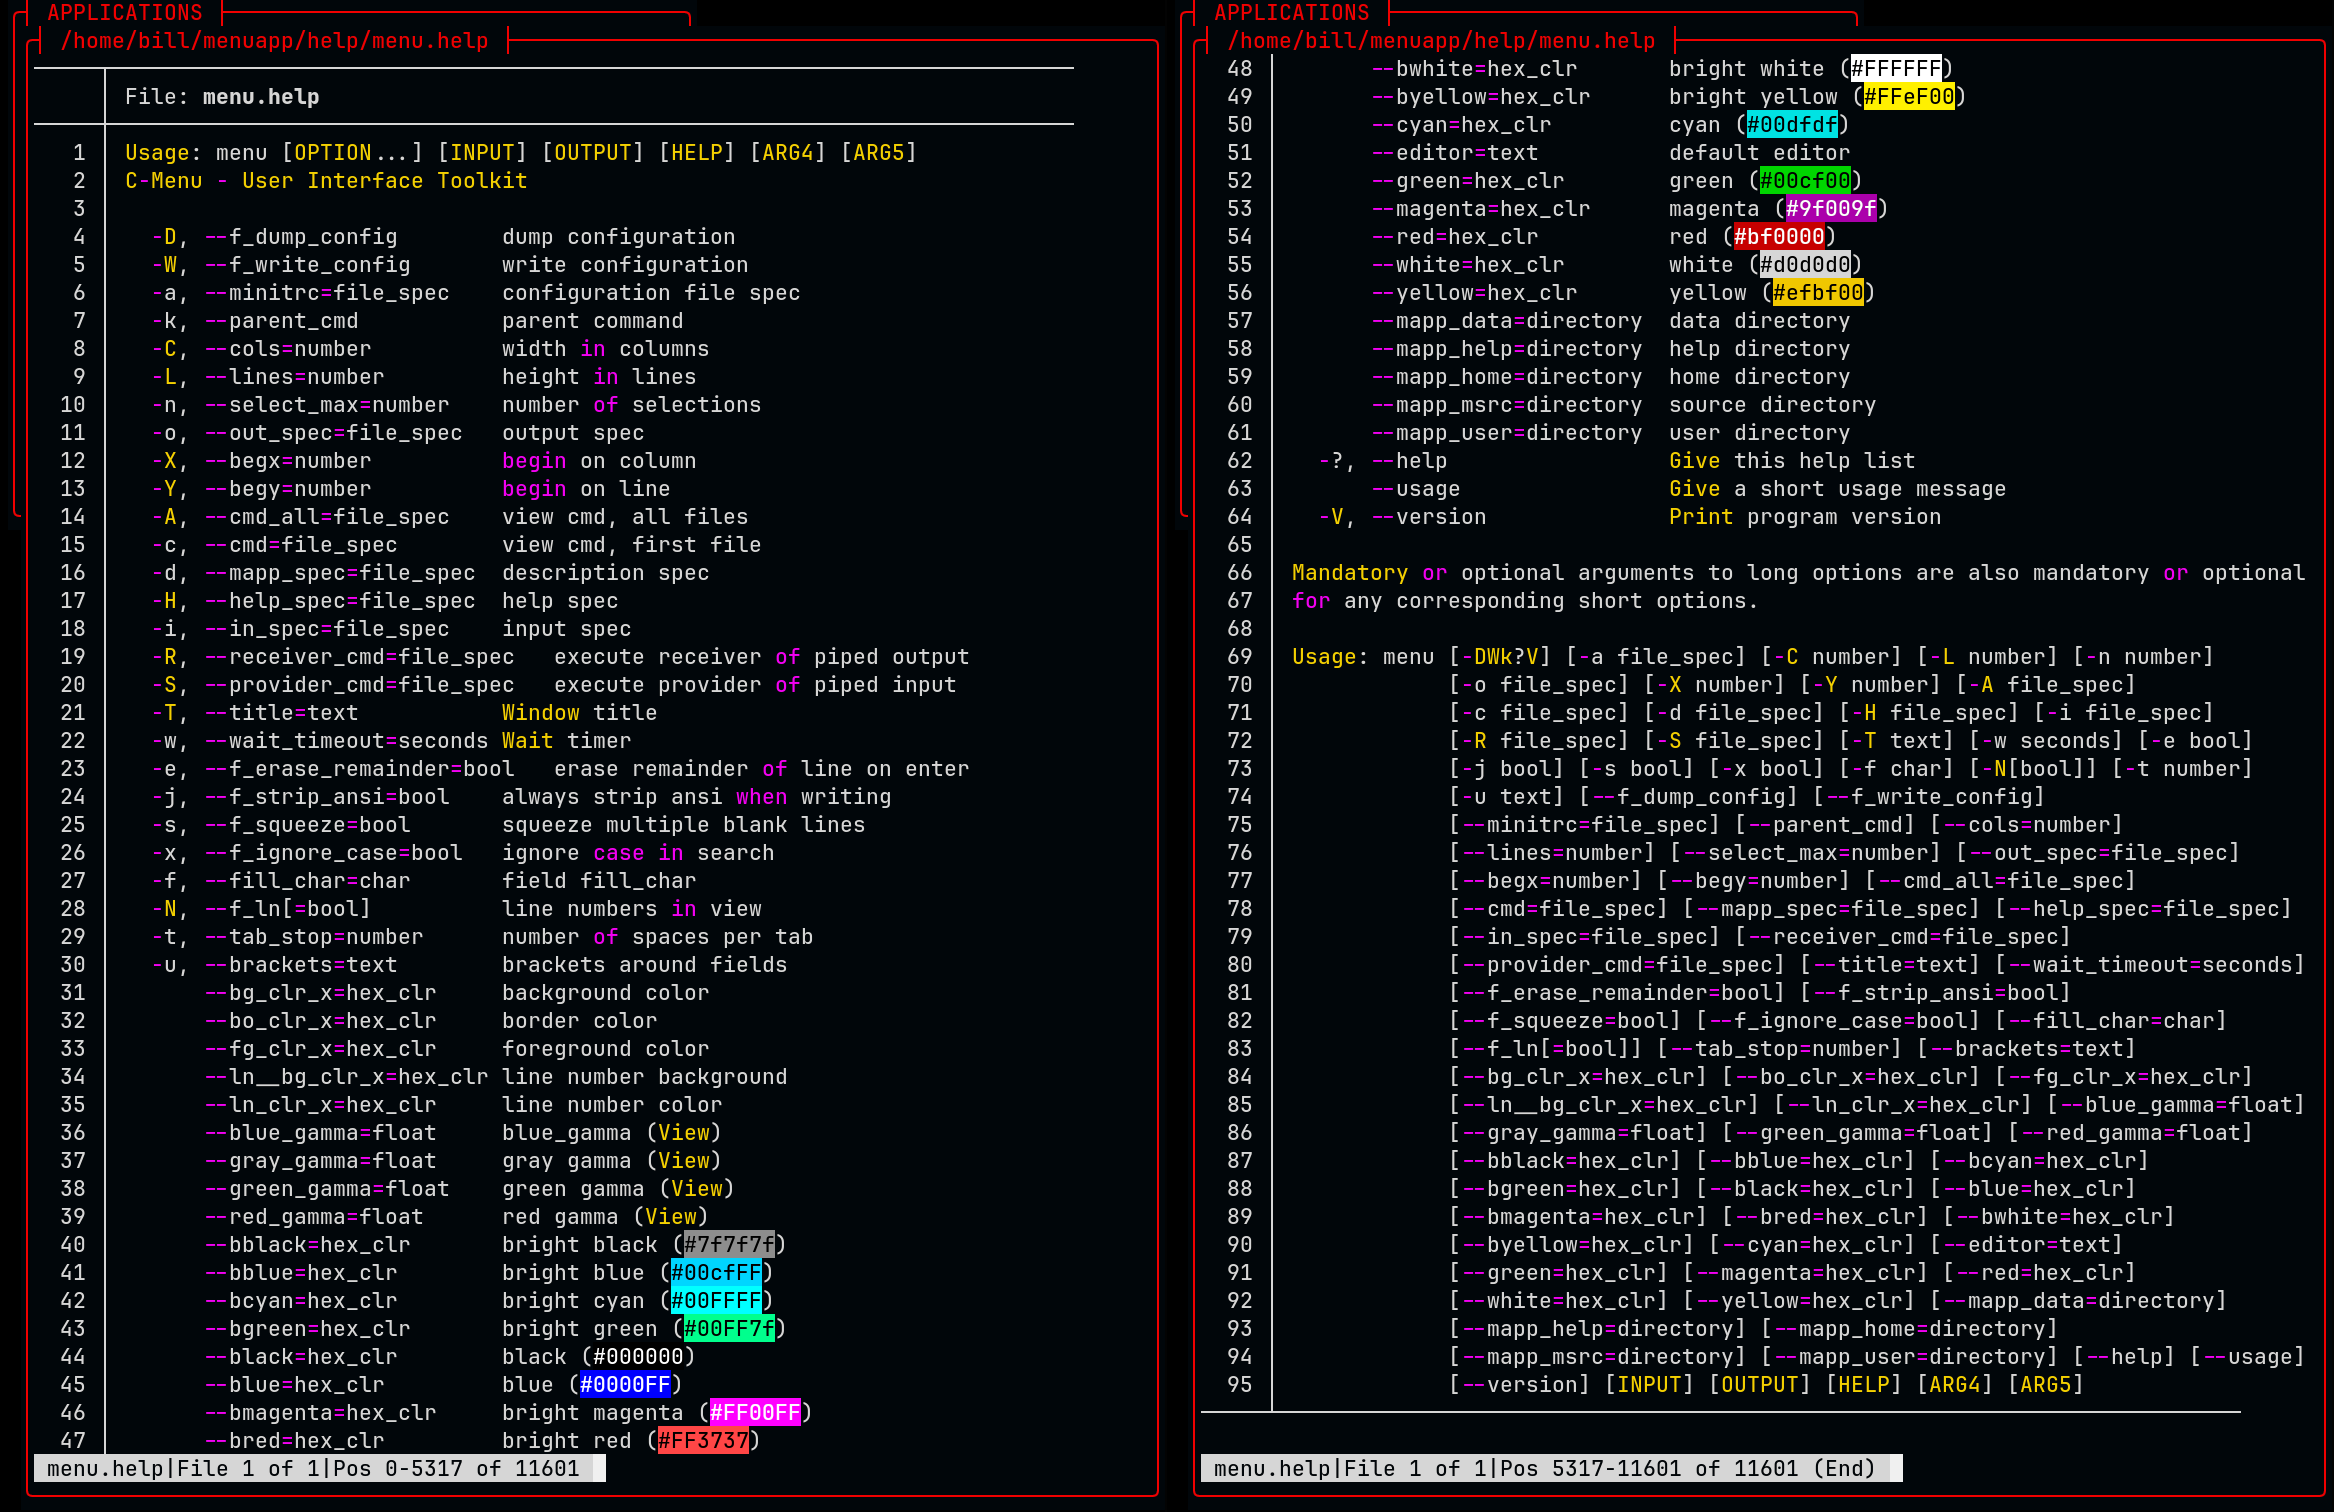
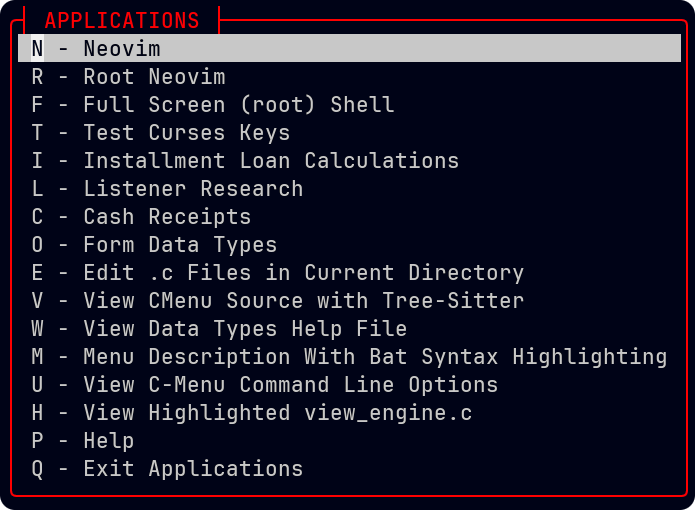
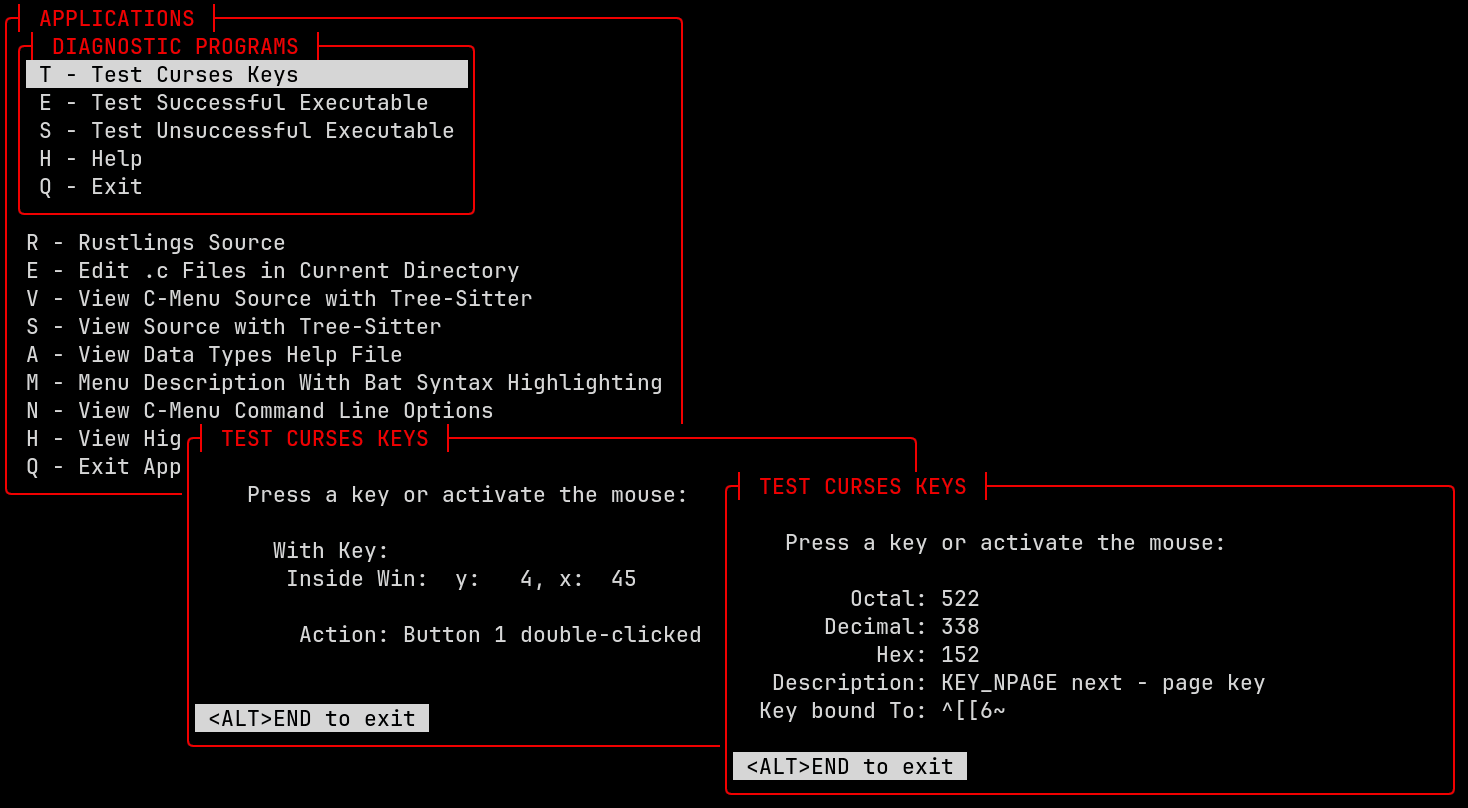
The menu above is intended to demonstrate a variety of features and techniques that can be applied to your projects. It is not meant to be a practical menu for everyday use, but rather a showcase of what is possible with C-Menu. Think of yourself as an artist and C-Menu as your canvas. What will you create?
Below is an example of source defining the above menu. This is the part you design as the top-level framework for your application.
This section will break down the Example C-Menu Applications Menu and explain how it works from the perspective of a developer using C-Menu to build applications. With this understanding, you will be ready to create custom software products with C-Menu.
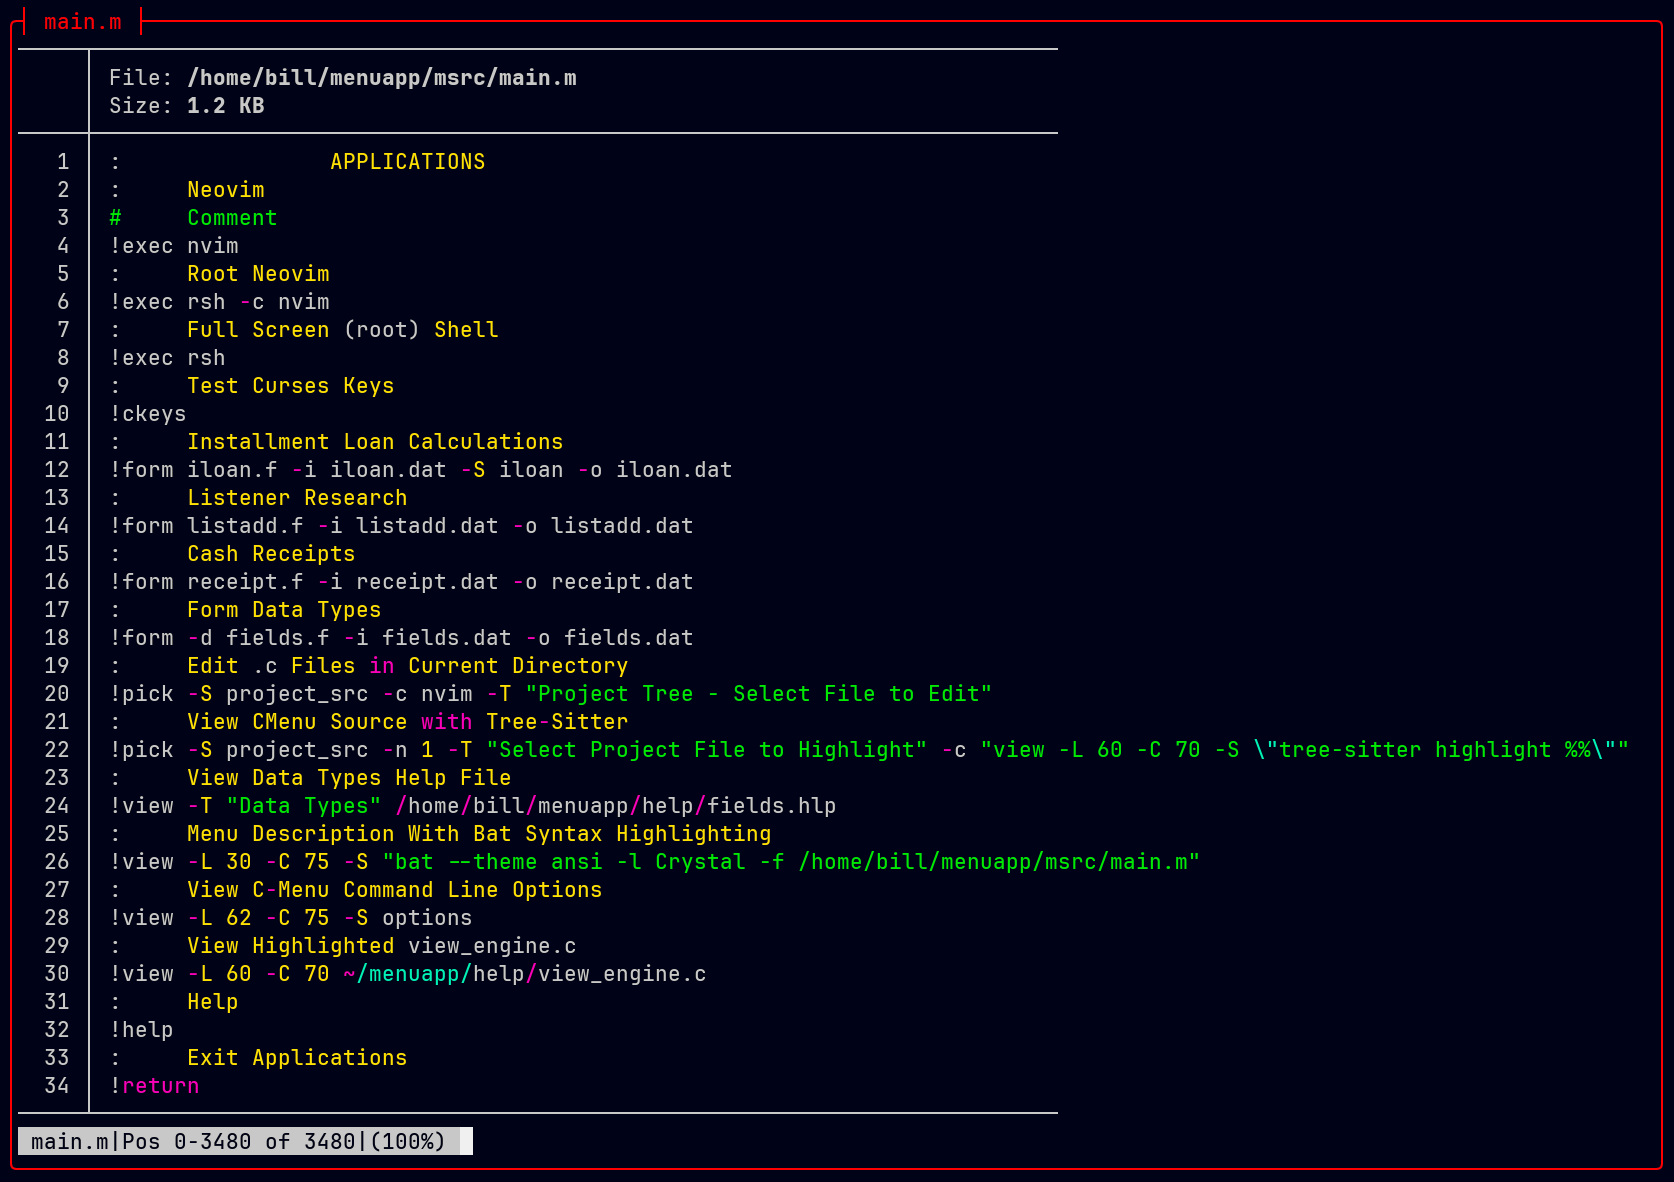
Notice the red highlighted lines in the menu description file above. That is a menu option that demonstrates how to edit the menu description files within C-Menu. You can use C-Menu to edit the menu description files that define your application, allowing you to make changes to your application's menu structure and commands without needing to exit the application. With this feature, you can quickly iterate on your application's design and functionality.
Lets examine the Menu source above and break down how it works. The source file is a simple text file that contains a series of User Choices and Commands.
In the C-Menu application directory, you will find an example, ~/menuapp/msrc/main.m. This example is designed to demonstrate a variety of features and techniques that can be applied to your projects. It is not meant to be a practical menu for everyday use, but rather a showcase of what is possible with C-Menu. Think of yourself as an artist and C-Menu as your canvas. What will you create?
Synopsis: Demonstrates how to use C-Menu to execute an external command, in this case, "rsh", which is a root shell alternative. When the user selects this menu item, C-Menu executes the "rsh" command, providing the user with a full-screen shell with root privileges. This can be useful for performing administrative tasks or troubleshooting issues that require elevated privileges.
Requirements: rsh owned by root, with setuid permissions.
Synopsis: Demonstrates how to create a sub-menu by specifying a menu description file, "workstation_config.m", which will be loaded and displayed when the menu item is selected. This allows you to create a hierarchical menu structure, with multiple levels of sub-menus, to organize your application and provide a more intuitive user experience.
Requirements: A menu description file, ~/menuapp/msrc/workstation_config.m, normally included with C-Menu. Alternatively, you can create this file with any text editor and populate it with menu items and commands relevant to workstation configuration tasks.
Synopsis: Demonstrates how to create a sub-menu by specifying a menu description file, ~/menuapp/msrc/diag.m, which will be loaded and displayed when the menu item is selected. Similar to Workstation Configuration.
Requirements: A menu description file, ~/menuapp/msrc/diag.m, normally included with C-Menu. Alternatively, you can create this file with any text editor and populate it with menu items and commands relevant to diagnostic tools and tasks.
Synopsis: Demonstrates how to use C-Menu Form to create a form-based interface for performing calculations based on form data. When the user selects this menu item, C-Menu executes the form command with the specified description file, "iloan.f". Form opens the input file, "iloan.dat", reads field data, and displays it in the Form window. The user edits the data and presses F10 Accept. Form then executes the "iloan" executable with the form data as arguments. "iloan" processes the form data and writes the resulting data to standard output. Form reads the resulting data from a pipe and displays the updated form data. The user can experiment with the numbers in the form, running as many calculation cycles as necessary. When the user gets the desired results, and presses F10 a second time, ~/menuapp/bin/amort executes with the form data and a loan amortization report is displayed with view.
Requirements: iloan and amort executables: These are simple programs distributed with C-Menu specifically for the purpose of this demonstration. If you don't have the "iloan" executable distributed with C-Menu, you can create a simple version of it in C or any programming language of your choice that accepts the data as arguments, standard input, or file, performs calculations, and writes the resulting data to standard output. You could even create a shell script or awk script to perform the calculations if you prefer. The point is to demonstrate how to use external executables with C-Menu Form, so the specific implementation of "iloan" is not important as long as it can read form data from standard input, perform calculations, and write the resulting data to standard output because that's all you need to integrate an external application with C-Menu Form.
Synopsis: This menu item is a placeholder for a future demonstration of how to use C-Menu to create an interface for conducting research on listeners, such as audio or network listeners. The specific implementation and requirements for this menu item will depend on the type of listener research being conducted and the tools and technologies being used.
Requirements: None.
Synopsis: Demonstrates how to use C-Menu Form to create a form-based interface for entering, editing, validating, processing, and submitting data related to cash receipts. When the user selects this menu item, C-Menu executes the form command with the specified description file, "receipt.f". Form opens the input file, "receipt.dat", reads field data, and displays it in the Form window. The user edits the data and presses F10 Accept. Form then writes the updated data to the specified output file, "receipt.dat". This menu item is not very useful as it stands. It is included here as a challenge in some industrious developer who can write external executables or scripts to provide database interaction and ancillary menu items to track deposit slips and batch numbers and post to general ledger.Synopsis:
Requirements: None
Synopsis: Demonstrates how to create forms using various data types.
Requirements: None
Synopsis: Demonstrates how to use C-Menu to streamline a repetitive work flow using lf and C-Menu Pick to automate the process of navigating to a directory, filtering for specific files, and opening those files in an editor. When the user selects this menu item, C-Menu executes the specified command line which launches Pick with the output of the "rust_src" script as its input. The "rust_src" script generates a list of Rust source files from the "exercises" directory, which is part of the Rustlings project. The user can then filter and select a file from the list, and Pick will automatically open the selected file in nvim for editing.
Requirements:
Synopsis: Instead of typing man commands, this menu item allows you to select from a group of manual pages residing in ~/menuapp/man.
Requirements: A group of manual pages stored in the ~/menuapp/man directory.
: Edit .c Files in Current Directory !pick -S project*src -T "Project Tree - Select File to Edit" -c nvim.sh %% : View C-Menu Source with Tree-Sitter !pick -S project_src -n 1 -T "Select Project Source to Highlight" -c "view -L 60 -C 85 -S \"tree-sitter highlight %%\"" : View Source with Tree-Sitter !pick -S "lf -S -d 5 . \".*\.(rs|c|h|sh|lua|py|cpp|js|html|css)$\"" -n 1 -T "Select Source File to Highlight" -c "view -L 60 -C 85 -S \"tree-sitter highlight %%\"" : lf Help !view -Nf -L50 -C86 ~/menuapp/help/lf.help : View Data Types Help File !view -Nf -L47 -C85 -S "bat --theme ansi -l Crystal -f ~/menuapp/help/fields.hlp" : Menu Description With Bat Syntax Highlighting !view -Nf -L 39 -C 85 -S "bat --theme ansi -l Crystal -f ~/menuapp/msrc/main.m" : View C-Menu Command Line Options !view -Nf -L66 -C75 ~/menuapp/help/menu.help : View Highlighted view_engine.c !view -N -L66 -C85 ~/menuapp/help/view_engine.c : Exit Applications !return
The menu description file is a simple text file that contains a series of User Choices and Commands. The first line of the menu description file is used as the Menu title, which is displayed at the top of the Menu window. Subsequent lines beginning with ":" are user choices that will be displayed in the menu. Lines beginning with "!" are commands to be executed by Menu when the corresponding menu item is selected. Lines beginning with "#" are comments.
There are no requirements for naming menu description files, but it is common practice to use the ".m" file extension for menu description files. The menu description file can be located anywhere in the file system, but it is common practice to store menu description files in a dedicated directory, such as ~/menuapp/msrc. If you follow this convention, you can simply specify the menu description file name without a path when referencing it in a command line, and Menu will look for the file in the ~/menuapp/msrc directory.
Each menu item has a key character that the user can press to select that menu item.
Earlier versions of C-Menu allowed only upper case letters as menu key characters. This became an impediment for larger menus, so we expanded the range of valid menu key characters to "!" through "~" (0x21 - 0x7e).
Menu uses a rudamentary algorithm to determine the key characters for menu items. It scans the menu text for the first character that is not a space, not already reserved, and in the valid key character range. If no such character is found, Menu will select the first unreserved letter in the valid range, even though it may not be in the menu text.
You may specify any character as a key by including it immediately (no space separation) following a dash ("-") as the first non-blank character in the the menu item text.
The above menu item will be displayed as " T - Diagnostic Tools" and the "T" will be the key character for that menu item.
Lower case ("q") is reserved as a key for the hidden "Quit", "Exit", "Return", etc. menu item which is part of every menu.
As an additional visual queue, key characters in the menu text will be displayed using "nt_hl_rev_fg" and "nt_hl_rev_bg" color pair. If you prefer not to use this visual queue, you can set "nt_hl_rev_fg" to the same color as "nt_rev_fg" and "nt_hl_rev_bg" to the same color as "nt_rev_bg" to the same color.
These colors are defined in the C-Menu configuration as six-digit hex RGB values:
Lines beginning with ":" are the User Choices.
Lines beginning with "!" are commands to be executed by Menu when the corresponding menu item is selected. These commands can be used to invoke internal C-Menu functions execute external commands, and run shell scripts.
Lines beginning with "#" are comments.
The first text line will be used as the Menu title to be displayed at the top window border.
Subsequent lines beginning with ":" are user choices that will be displayed in the menu.
The command line, beginning with "!" following each menu choice is executed by C-Menu Menu when the user selects that menu item. The user can click the desired Menu line with the mouse, position the cursor over the desired Menu line by using navigation keys, up and down arrow keys, or j and k, and the pressing enter or pressing the letter on the left of the desired Menu item.
Menu items always consist of the text displayed in the menu and a command to be executed when the menu item is selected. The command can be an internal C-Menu function, an external command, or a shell script. The command can also include options and arguments to customize its behavior.
Example:
The following menu item, Workstation Configuration, demonstrates how to create a sub-menu by specifying a menu description file, "workstation_config.m", which will be loaded and displayed when the menu item is selected. This allows you to create a hierarchical menu structure, with multiple levels of sub-menus, to organize your application and provide a more intuitive user experience.
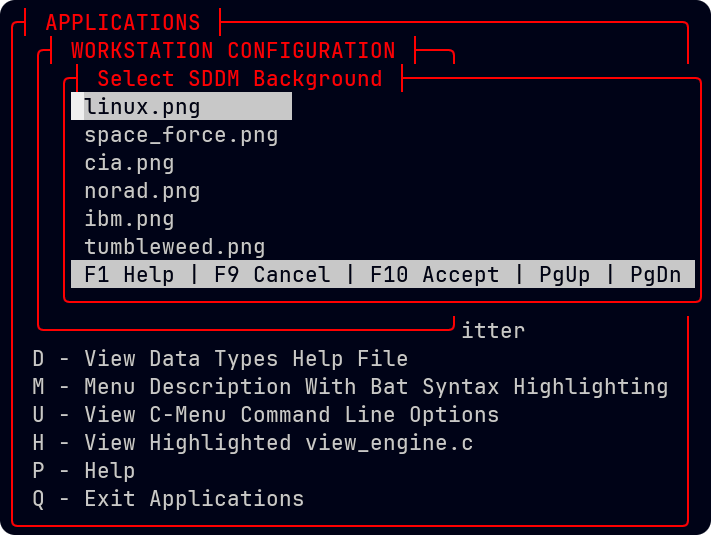
Diagnostic Tools is another menu item that specifies a menu description file, "diag.m", which will be loaded and displayed when the menu item is selected. This demonstrates how you can create multiple menus for different purposes and link them together through menu items.
 1.17.0