 |
C-Menu 0.2.9
A User Interface Toolkit
|
|
C-Menu 0.2.9
A User Interface Toolkit
|
C-Menu Pick displays a list of items from which the user can select.
Specification:
-n maximum_number_of_selections. "-n n" is a convenience which directs Pick to automatically accept selections when the specified maximum number of items, "n" have been selected. For example, "-n 1" is commonly used to direct Pick to automatically accept the first item selected without requiring the user pressing to F10 Accept key. This feature is designed to optimize the user's economy of motion, making the selection process extremely fast and efficient. When "-n 1" is specified, the user can simply select an item and Pick will immediately dispatch the specified action.
-c execute command substituting "%%" with the selected item(s). Whether the command specified with the -c option is executed once per selection or once for all selections is determined by the presence or absence of the "-m option". Without the "-m" option, by default, if multiple items are selected, the command specified with -c will be executed once for each selection with that selection as an argument.
-m multiple_arguments flag. The -m option directs Pick to construct a command line with all selections as individual arguments. The specified command is executed once with all selections combined as individual arguments on a single command line.
An example use case for "-m" would be if you wanted to open multiple files in C-Menu View using View's ":n" and ":p" commands to navigate between files. In that case, you would specify "-m" to have Pick execute View once with all selected files as arguments, allowing you to use View's built-in file navigation features. The same technique works with Vim, nvim, and less.
-i input_file directs Pick to read input from the specified file
-S executable_provider directs Pick to execute the specified external command and read input from the command's standard output. The command specified with the -S option is executed when starting Pick, and its output is used as the list of items from which selections are made.
-o output_file directs Pick to write selected items to the specified file when the user presses F10 Accept.
Pick must have exactly one input method, either -i input_file or -S executable_provider_command. Combining -o and -c options is permissible, and will direct Pick to write the list of selected items to the specified file and also pass the list of selected items to the command specified by -c according to the presence or absence of the -m option. The selections are written to file before executing the specified command, so the command can read the selections from the file if needed.
Example:
-S specifies a script, "rust_src", located in ~/menuapp/bin, which calls lf to create a sorted file list.
Below are the contents of "rust_src", a shell script. We use a shell script here instead of direct execution because we need to pipe the output through sort. It's still fairly quick. The "lf" command generates a list of Rust source files from the "exercises" directory, which is part of the Rustlings project.
The "-n 1" option directs Pick to proceed with executing the command specified by the "-c nvim %%" option after 1 file is selected. If "-n 1" were not specified, Pick would wait for the user to press F10 Accept before executing the command specified by the "-c nvim %%" option.
The -c nvim %% substitutes the "%%" with the selected file and Pick executes
nvim. If the "-n 1" option hadn't been specified, Pick would allow the user to select multiple files and press F10 Accept to accept those selections. In that case, nvim would be executed with multiple files as arguments, and the user could use nvim's ":n" and ":p" commands to open the files selectively. The "-n" option can also be used to specify the maximum number of selections before Pick automatically accepts and launches the specified executable.
The use of "-S rust_src"" would be equivalent to "rust_src | pick" if we were executing pick as a stand-alone executable. In this instance, Pick launches "rust_src" and creates a pipe to receive its output".
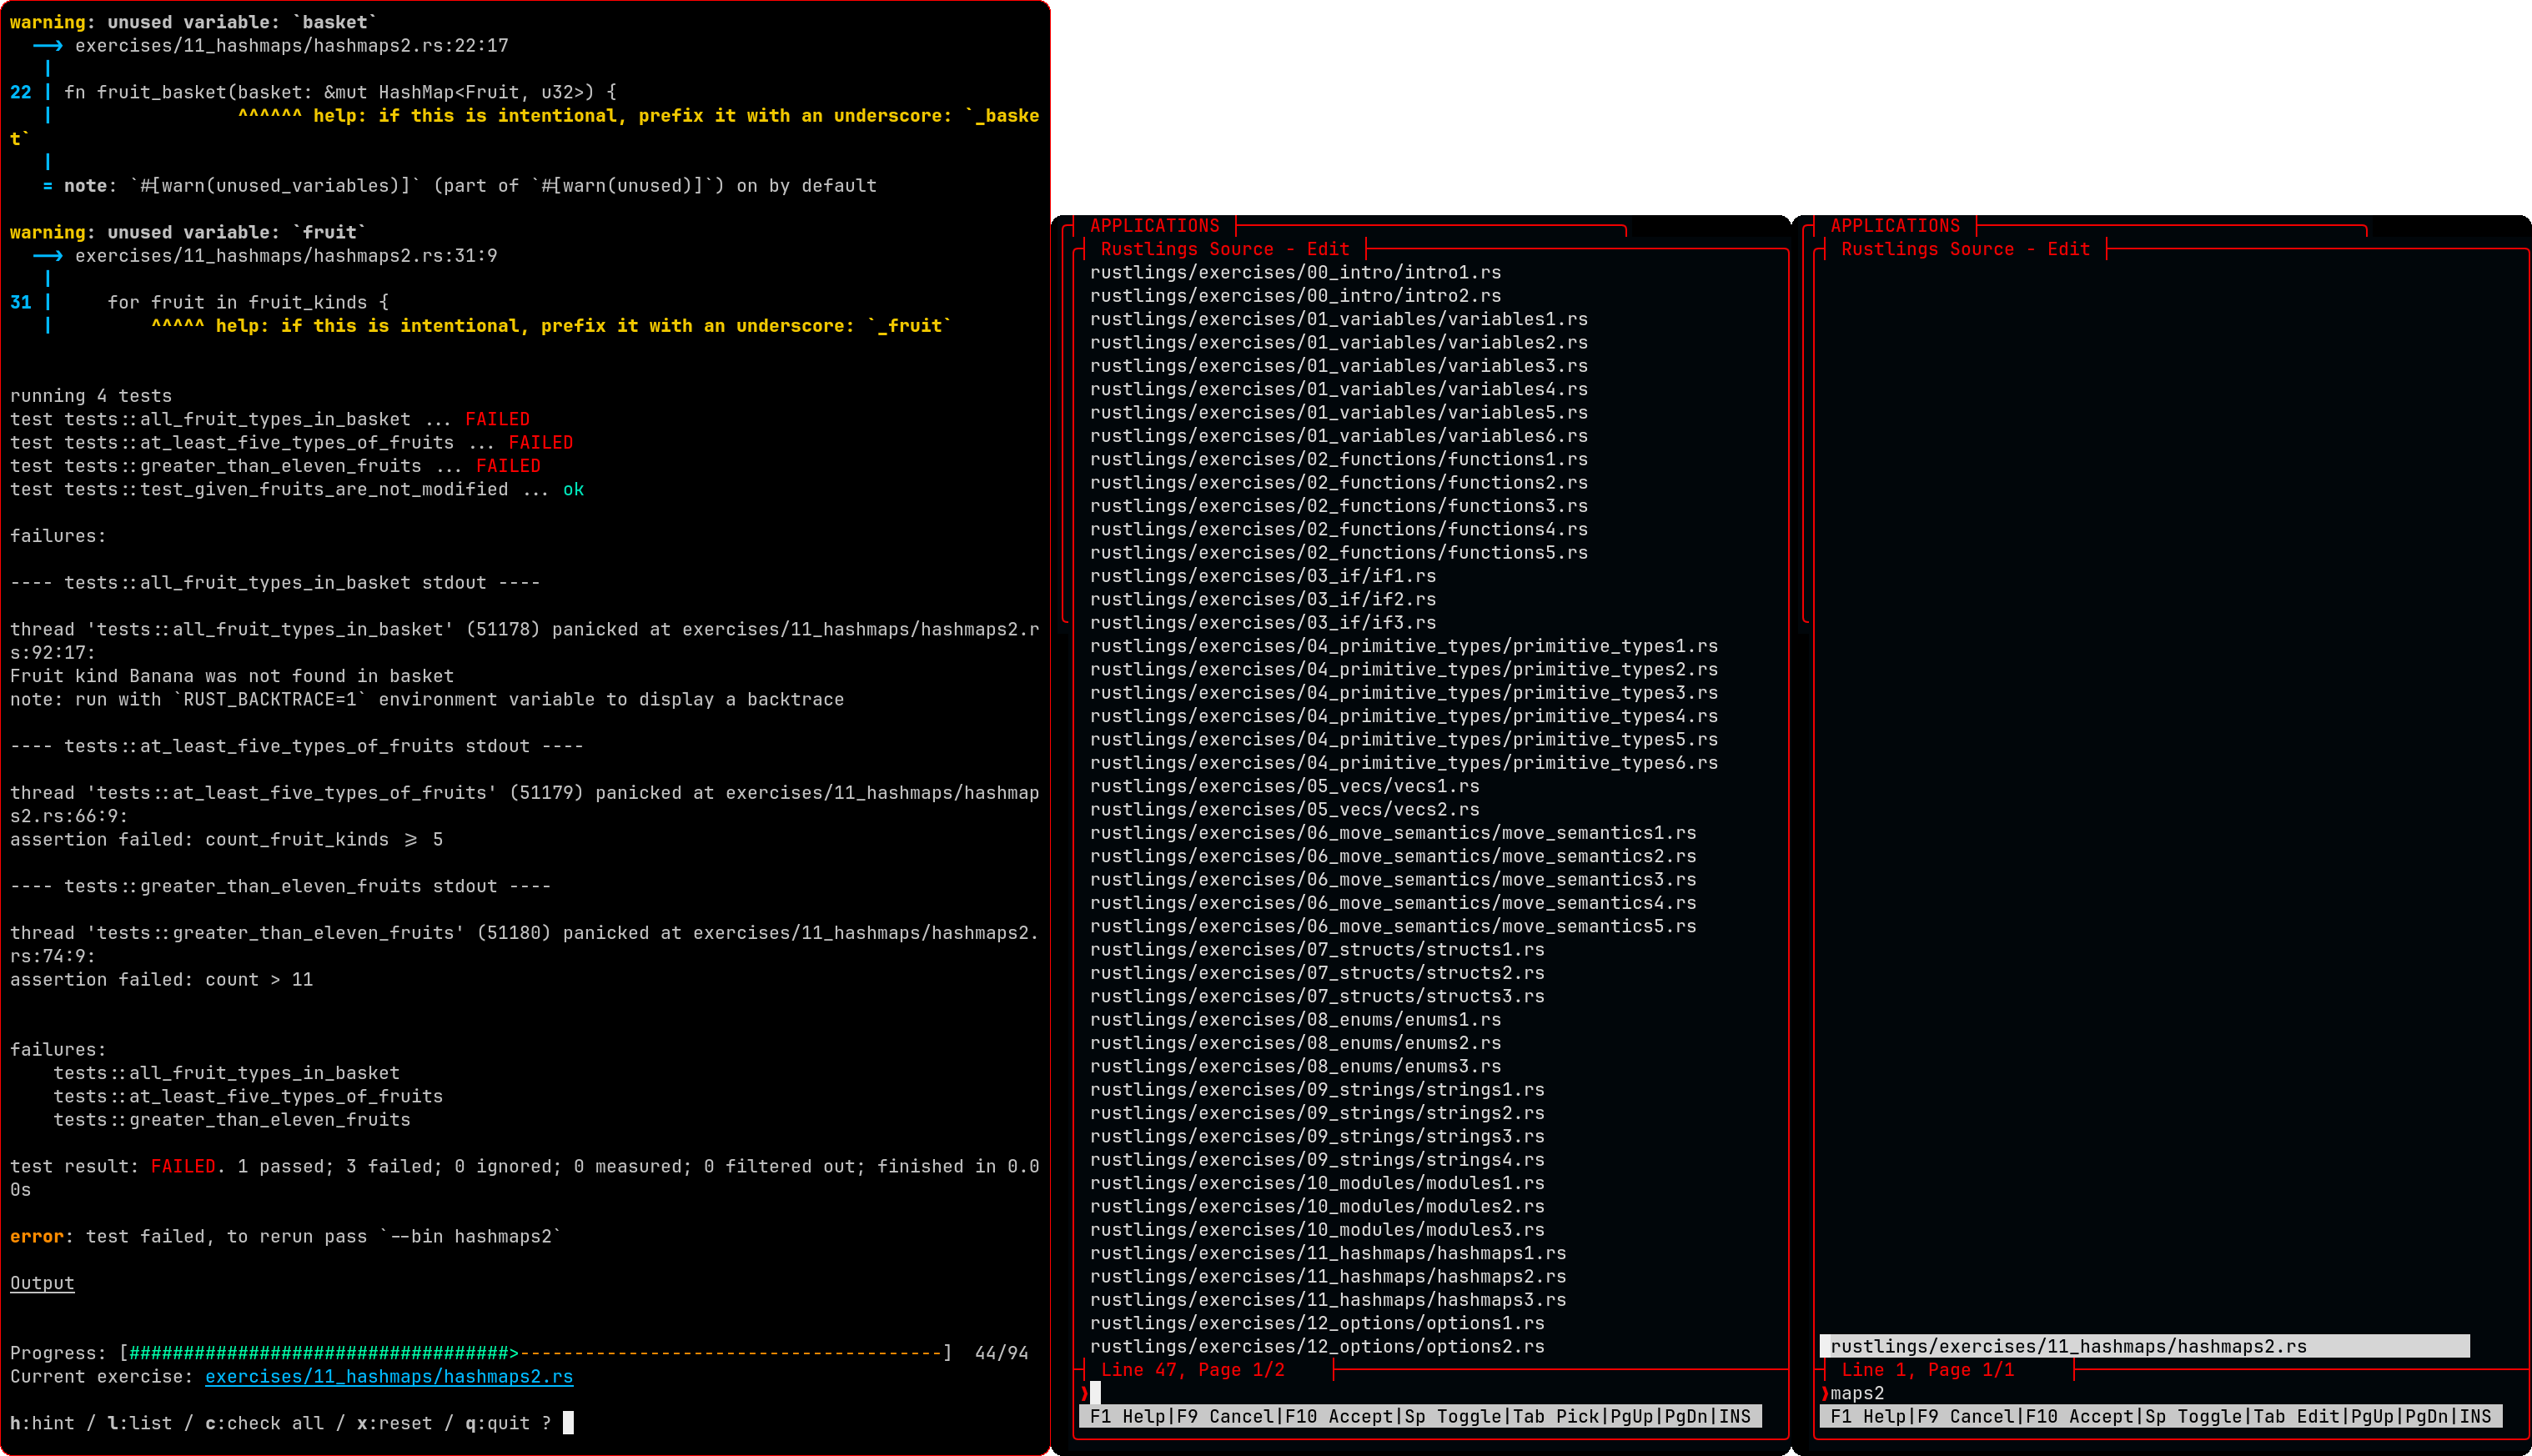
The center window above shows Pick as it appears just after selecting Rustlings Source in the Applications Menu.
The user presses tab to activate the line editor and types "maps2", the last few characters of the exercise name, and the Pick window on the right appears. The "maps2" expression filtered out all but one file name. The user doesn't need to press enter to accept the filter expression because Pick updates the Pick window in real time as the user types.
At any time, the user can press tab to jump back to the selection window, and select the desired file with the mouse or position the cursor on the desired file and press spacebar to select. In this case, there is only one file listed, so the user can simply press spacebar to select the file. Because the "-n 1" option in the Pick command line directs Pick to automatically accept when the user has selected the specified number of files.
So, the user presses tab, the cursor jumps to the only file listed, and the user presses the spacebar to open the selected file with nvim. If there had been more than one file listed, the user could select a file with the mouse, arrow keys, or j for down, k for up, and when the desired file is highlighted, and pressing spacebar to select. When using the mouse to select, it is not necessary to press the spacebar.
When finished editing in nvim, the user can type shift "zz" to exit. nvim closes, and the user is returned to the Pick window as it was before selecting the file. The user can press tab, backspace, 3, tab, spacebar, and nvim opens hashmaps3.rs, the next source file in the Rustlings sequence. This is a very quick and almost effortless way to step through the Rustlings exercises, but it can also apply to many other situations.
Edit .c Files in Current Directory is an example of how to use C-Menu lf and Pick to navigate and select files from a directory. Once a file is selected, it is passed to the nvim.sh script to be opened in Neovim. This demonstrates how you can integrate C-Menu with external applications and scripts to create a seamless user experience.
Actually, the above command line is a good example of how to write inefficient and unnecessary code. That's 100ms wasted each time you select that menu option. (-: :-) The nvim.sh script is not necessary. The command line could be written more efficiently as follows, which eliminates the need for an external script and directly opens the selected file in Neovim.
The command line below demonstrates the preferred method of starting nvim.
Also, if you have a situation in which the script, "project_src" could be replaced by a direct command line, such as "lf -d 5 '.\*\.c$'", that would be more efficient than using an external script. The command line below demonstrates how to directly use the "lf" command to generate a list of .c files in the current directory and its subdirectories, without the need for an external script.
Look Mom! No scripts! Just direct command lines. This is the most efficient way to write your menu commands, but it may not always be the most practical or maintainable way, especially if you have complex command lines that are difficult to read and understand. In those cases, using shell scripts can help simplify your command lines and make them more readable and maintainable.
View C-Menu Source with Tree-sitter demonstrates how to use shell scripts to simplify complex command lines. The command line below uses a shell script , "tree-sitter highlight", to apply syntax highlighting to the selected source file using Tree-Sitter.
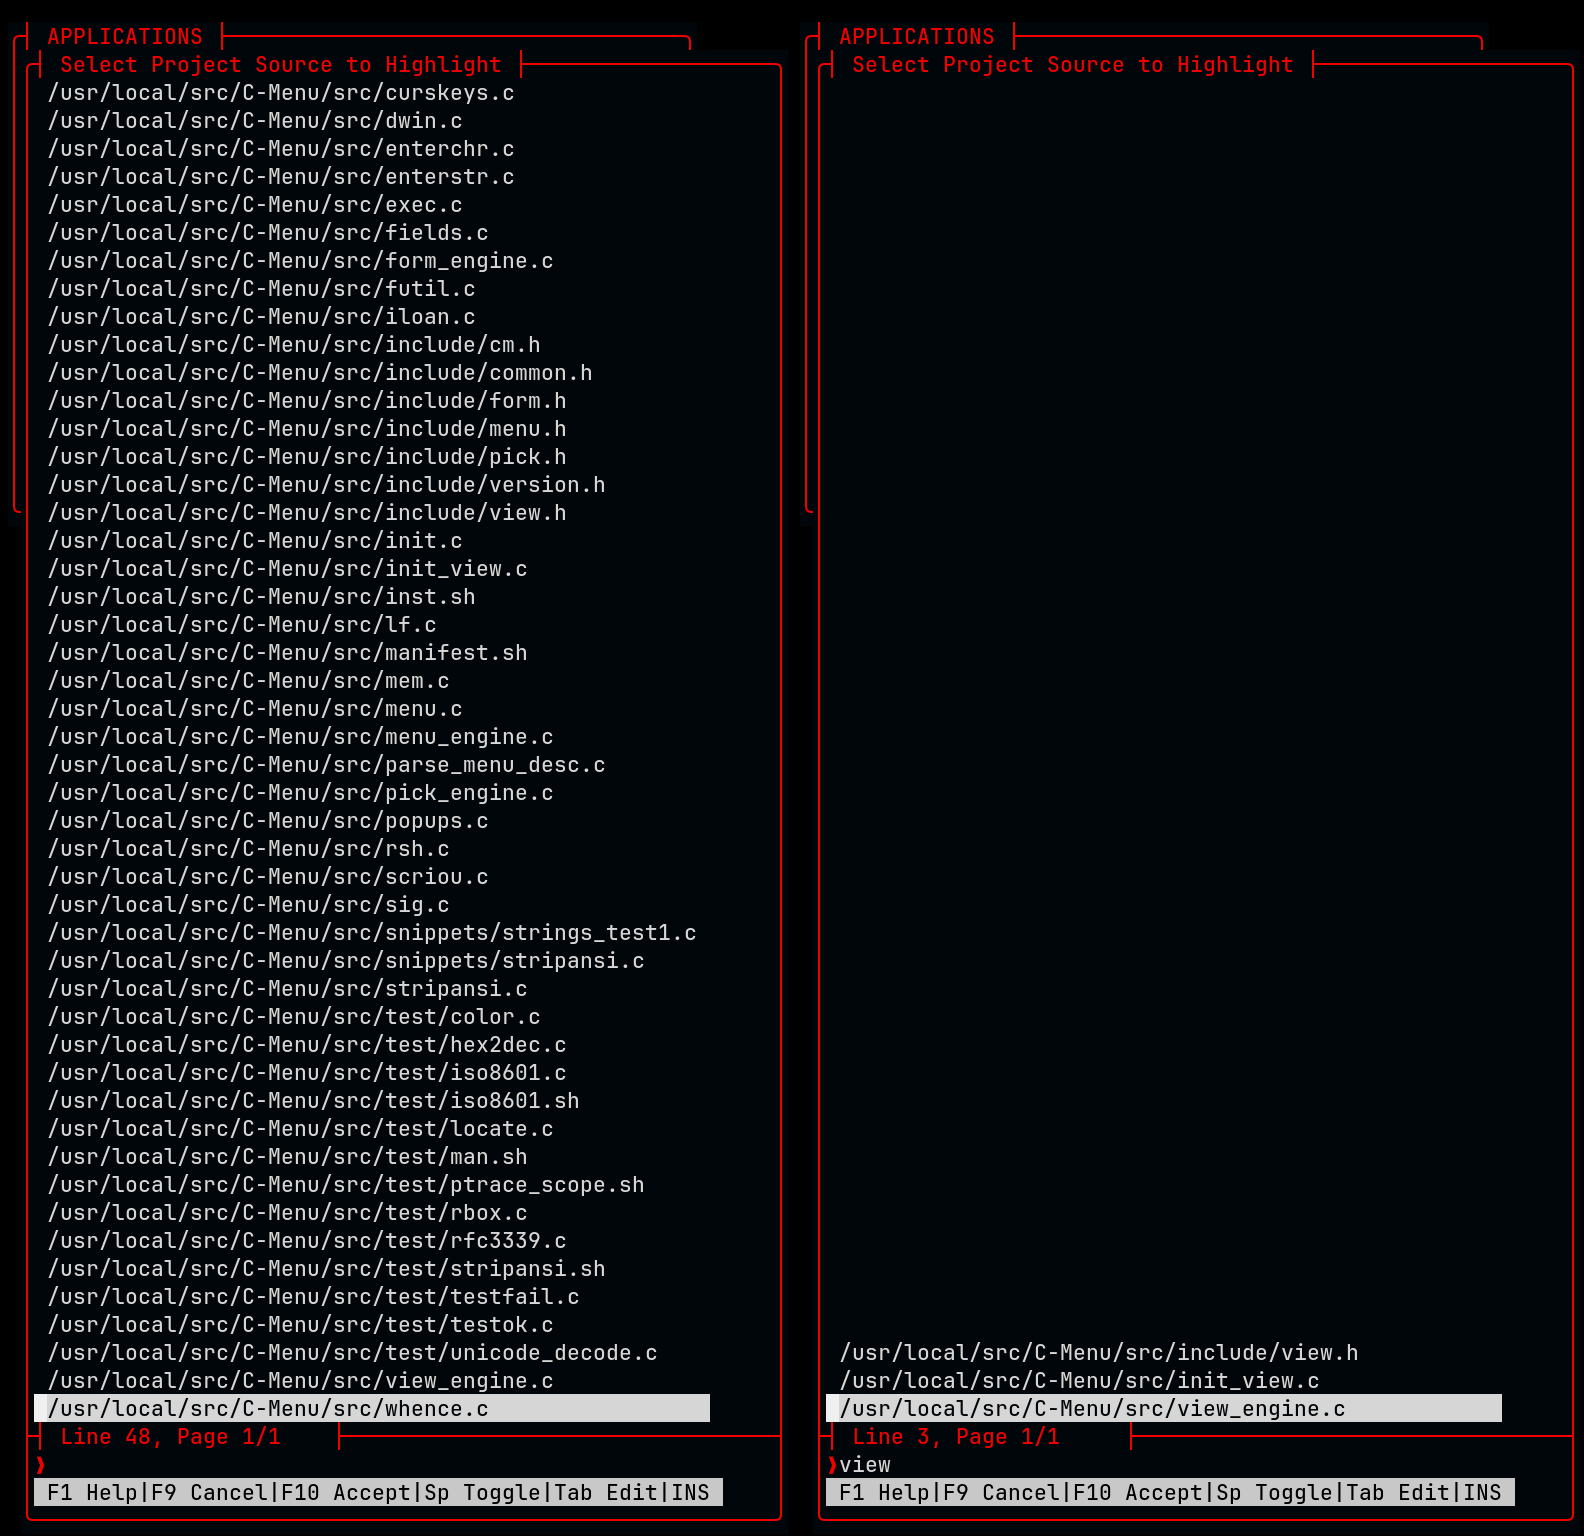
It is not necessary to use a filter expression in Pick. You can just as easily mouse click the particular file you want to select. However, it comes in handy when you have several pages of files.
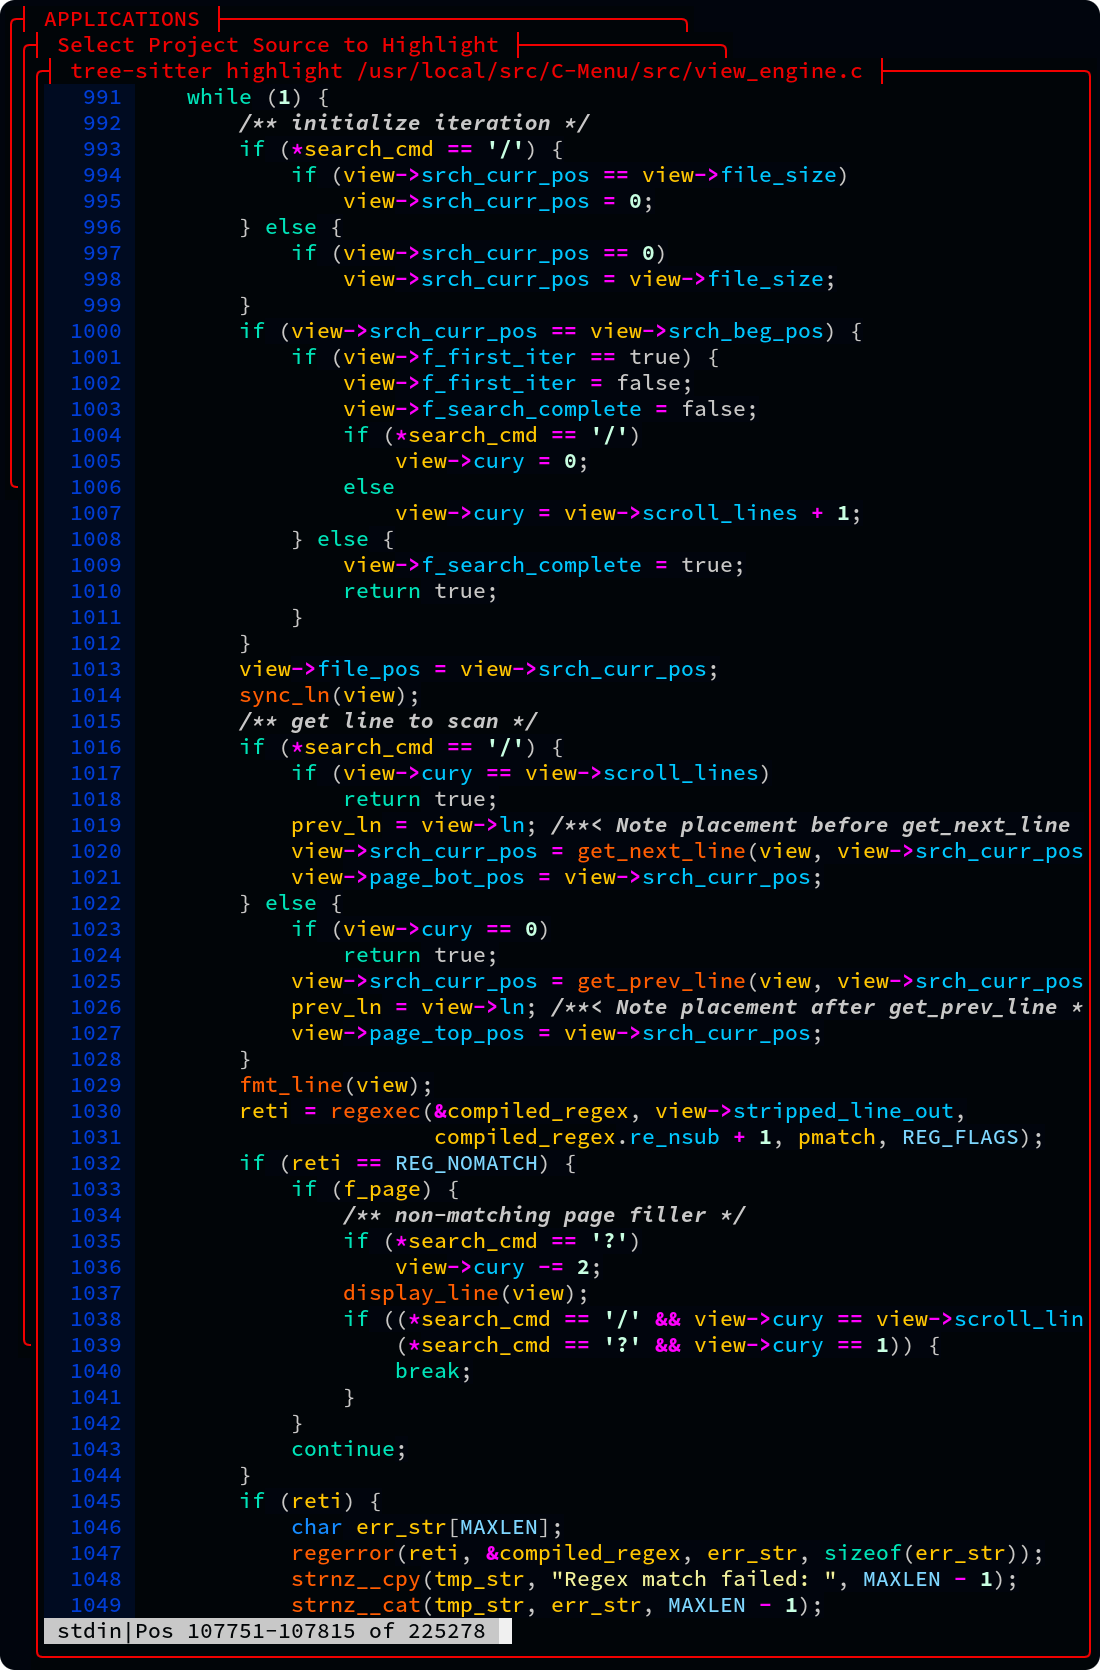
This image of the View window has line numbers because f_ln is set to true in the C-Menu configuration file. If you don't have f_ln set to true in the configuration file, you can also use "-N" on the command line to enable line numbers. If you have f_ln set to true in the configuration file, and you don't want line numbers, you can specify "-Nf" on the command line to disable line numbers for that particular view instance.
 1.17.0