 |
C-Menu 0.2.9
A User Interface Toolkit
|
|
C-Menu 0.2.9
A User Interface Toolkit
|
The purpose of the EXERCISES section is to provide you with practice problems similar to those you might encounter as a developer or system administrator. We are just barely getting started, so please be patient. The exercises will become more complex as we progress through the course.
As an added benefit, the exercises will provide a great test bed for debugging the C-Menu code. As always, your comments and suggestions (even complaints) are welcome.
The objective of this exercise is to Create a C-Menu Menu that allows users to safely and easily configure their system settings. We will start with a simple menu that allows users to select a new SDDM background image. This exercise assumes you have sddm installed and that the sddm theme is located in /usr/share/sddm/themes.
1️⃣ In your editor, open a new file:
2️⃣ Add the following content to the file and save it:
3️⃣ Open another file to create a bash script:
4️⃣ Add the following content to the file, save it, and make it executable:
This script will change the ownership of the SDDM background directory to the current user, allowing them to select a new background image. It will then list the available background images which will provide input for C-Menu Pick. Don't forget to make the script executable.
5️⃣ Now, create another bash script:
6️⃣ Add the following content to the file, save it, and make it executable:
Pick will execute this script, passing the selected background image as an argument. The script will create a symbolic link named default.png that points to the selected background image, effectively changing the SDDM background.
7️⃣ Finally, test your menu by running it from the command line:
8️⃣ You may want to add the Workstation Configuration option to your main menu. To do this, open your main menu file:
9️⃣ Add the following lines to include the Workstation Configuration menu:
From the C-Menu main menu, you should now see an option for Workstation Configuration. Selecting it will take you to the menu where you can choose a new SDDM background image.
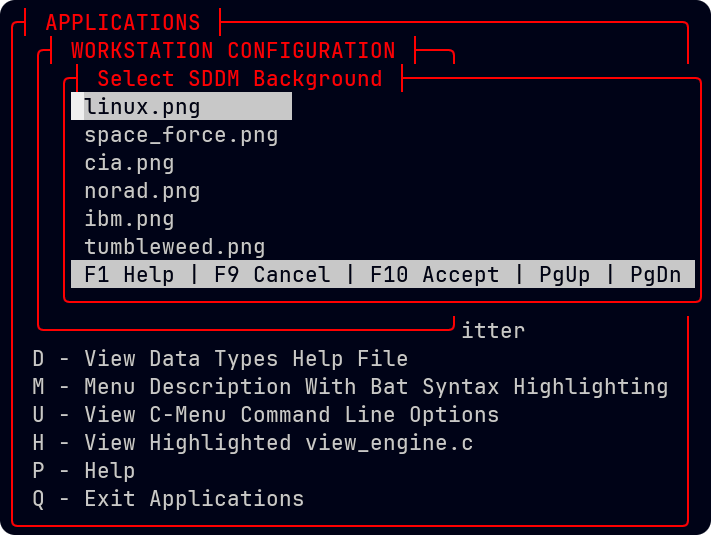
To verify that the background has been changed, you can log out of your session and return to the SDDM login screen. You should see the new background image you selected. Or, you can check the symbolic link in the SDDM background directory to confirm it points to the correct image.
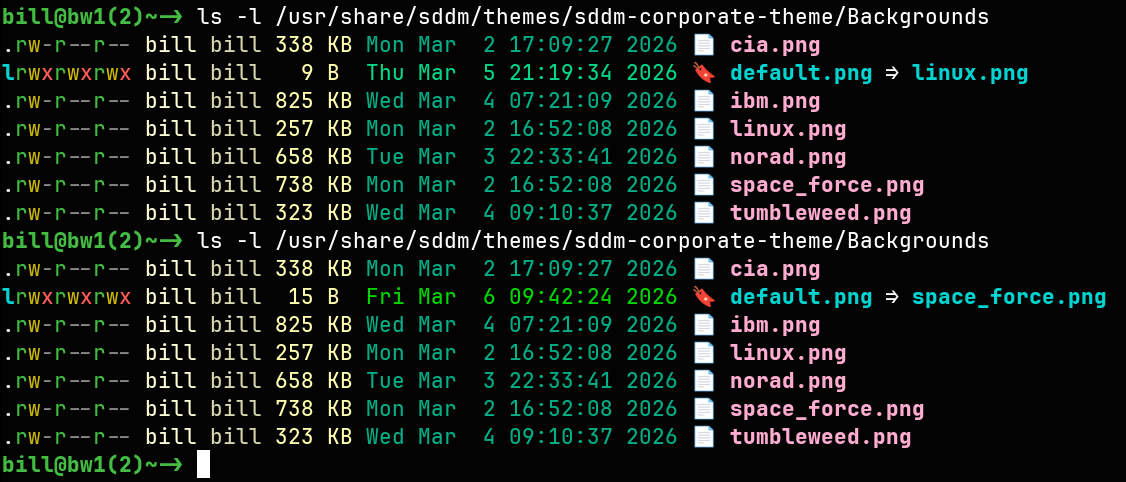
The above image shows the SDDM background directory before and after selecting the space_force.png background image.
1️⃣ In this exercise, we will add Ghostty configurations for color themes and fonts to the Workstation Configuration. First, open the workstation_config.m file:
2️⃣ Add the following lines to the workstation_config.m to include options for Ghostty themes and fonts:
3️⃣ Next, create the ghostty_themes.sh and ghostty_chtheme.sh scripts:
4️⃣ Add the following content to the file, save it, and make it executable:
5️⃣ Now, create the ~/menuapp/bin/ghostty_chtheme.sh script, add the following content, save it, and make it executable.
6️⃣ Finally, create the ghostty_fonts.sh and ghostty_chfont.sh scripts:
7️⃣ Test your menu again by running it from the command line:
Or, if you have installed the ~/.bashrc configurations described in Augmenting C-Menu, you can just type mm to start C-Menu and navigate to the Workstation Configuration menu.
The process for adding Alacritty and Kitty configurations is similar to the Ghostty configuration. You will need to create scripts to list available themes and fonts for Alacritty and Kitty, as well as scripts to change the default theme and font by creating symbolic links.
You may want to automate the creation of these scripts by using sed to replace "ghostty" with "alacritty" and "kitty" in the existing Ghostty scripts. Here's an example of how you can do this:
Here is the final content of the workstation_config.m file after adding the Alacritty and Kitty configuration options:
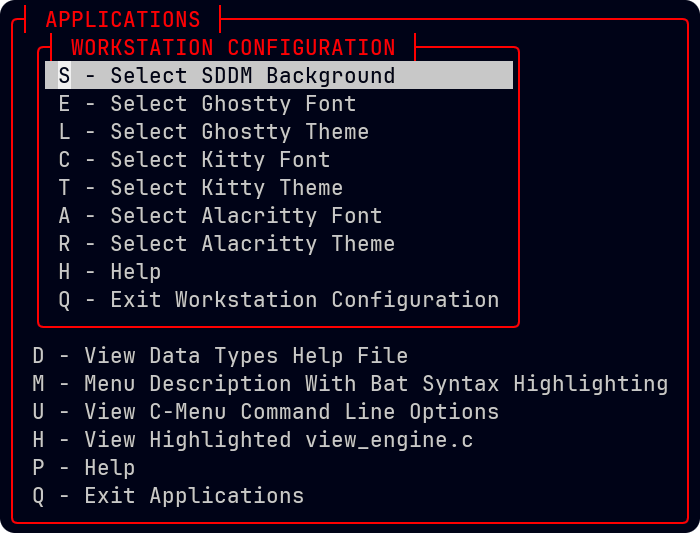
The objective of this exercise is to streamline the process of iteratively editing the Rustlings exercises with C-Menu Pick. Of course, there is a simpler and fully automatic way to do this, but this exercise is meant to give you practice with C-Menu Pick for similar projects without the built-in tracking that Rustlings provides. For example, see the following bash script:
But, don't use the above script. It hasn't been fully tested and there are probably instances in which it won't work. C-Menu Pick is more fun, and it provides a more controlled way to edit the Rustlings exercises.
Before starting this exercise, you will need to install the Rust toolchain and Rustlings. The easiest way to do this is as follows:
Start Rustlings:
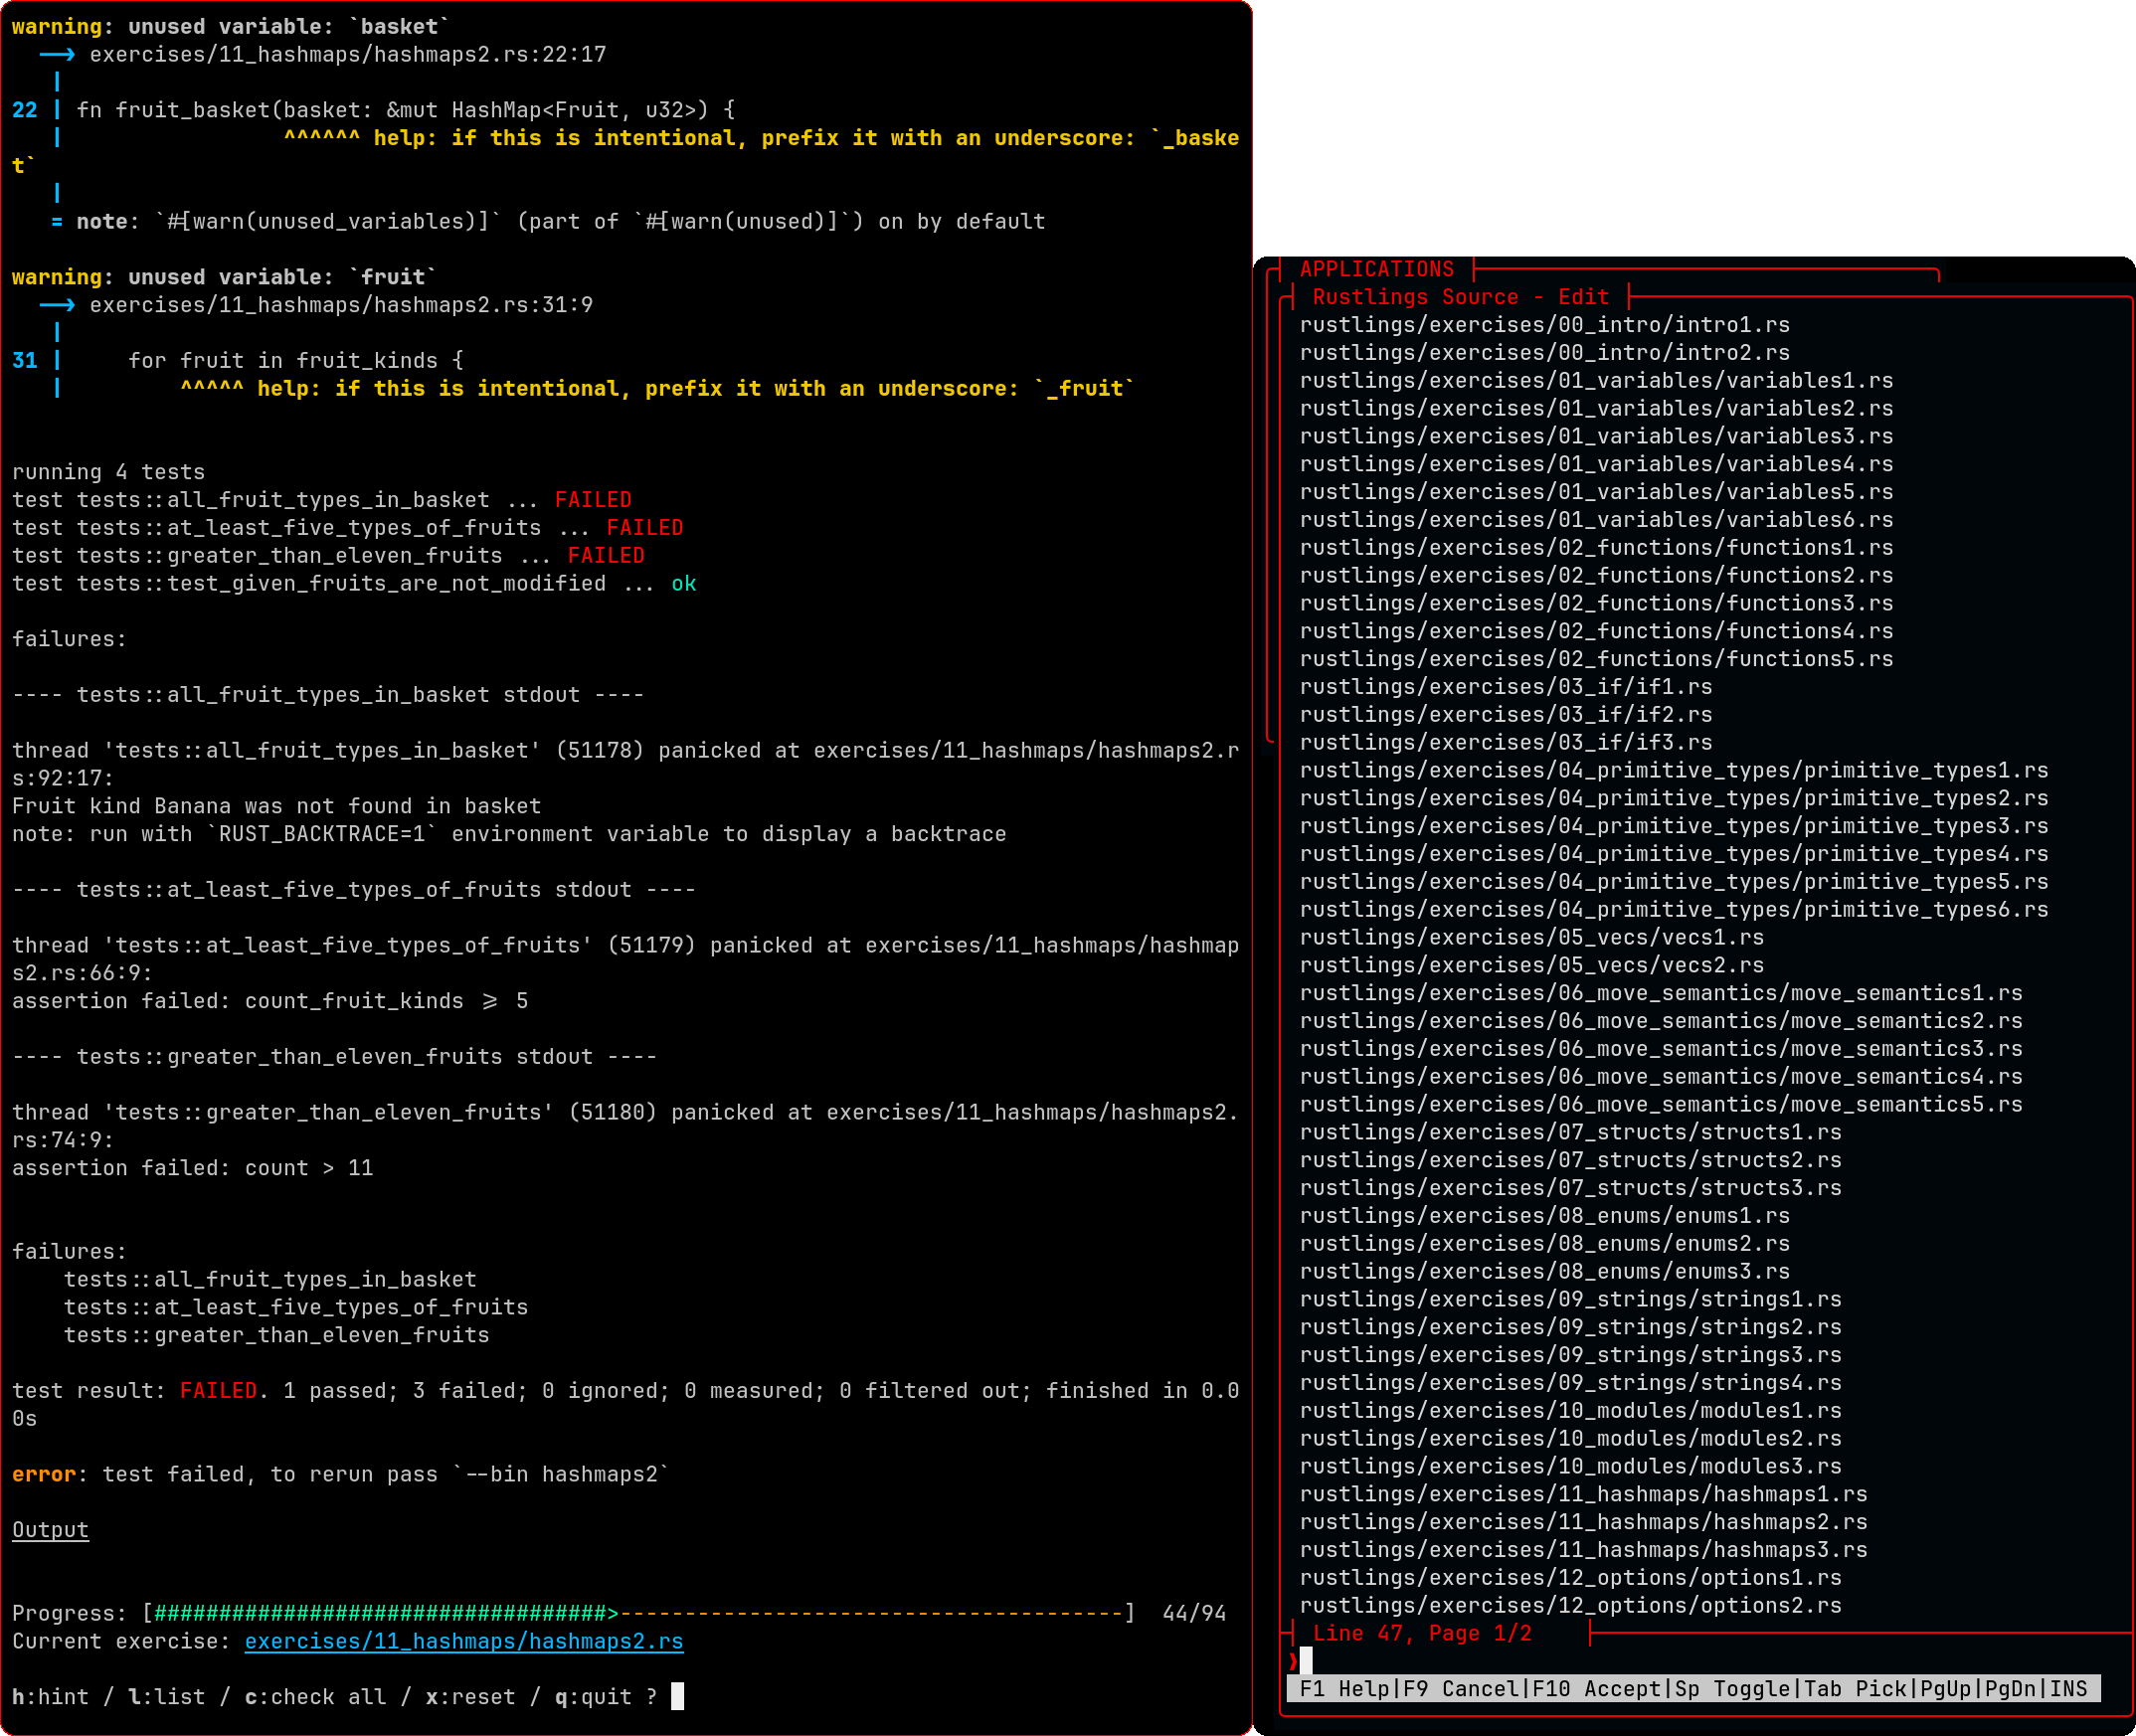
At the bottom of the rustlings display, you will notice the line, "Current exercise: " and the relative path of the Rust source file for the current exercise. This is the file you will be editing with C-Menu Pick.
Start C-Menu and select the Rustlings Source option. When it appears, press the tab key to activate the line editor. Type the last few characters of the file name in the line editor window. For example, "maps2".
Press the tab key again to activate the object selector. Select the line containing the file name that matches the current exercise. In this case, there is only one file that matches, so press the space bar to select it. The selected file will be opened in Neovim (or your preferred editor if you change nvim.sh) for editing.
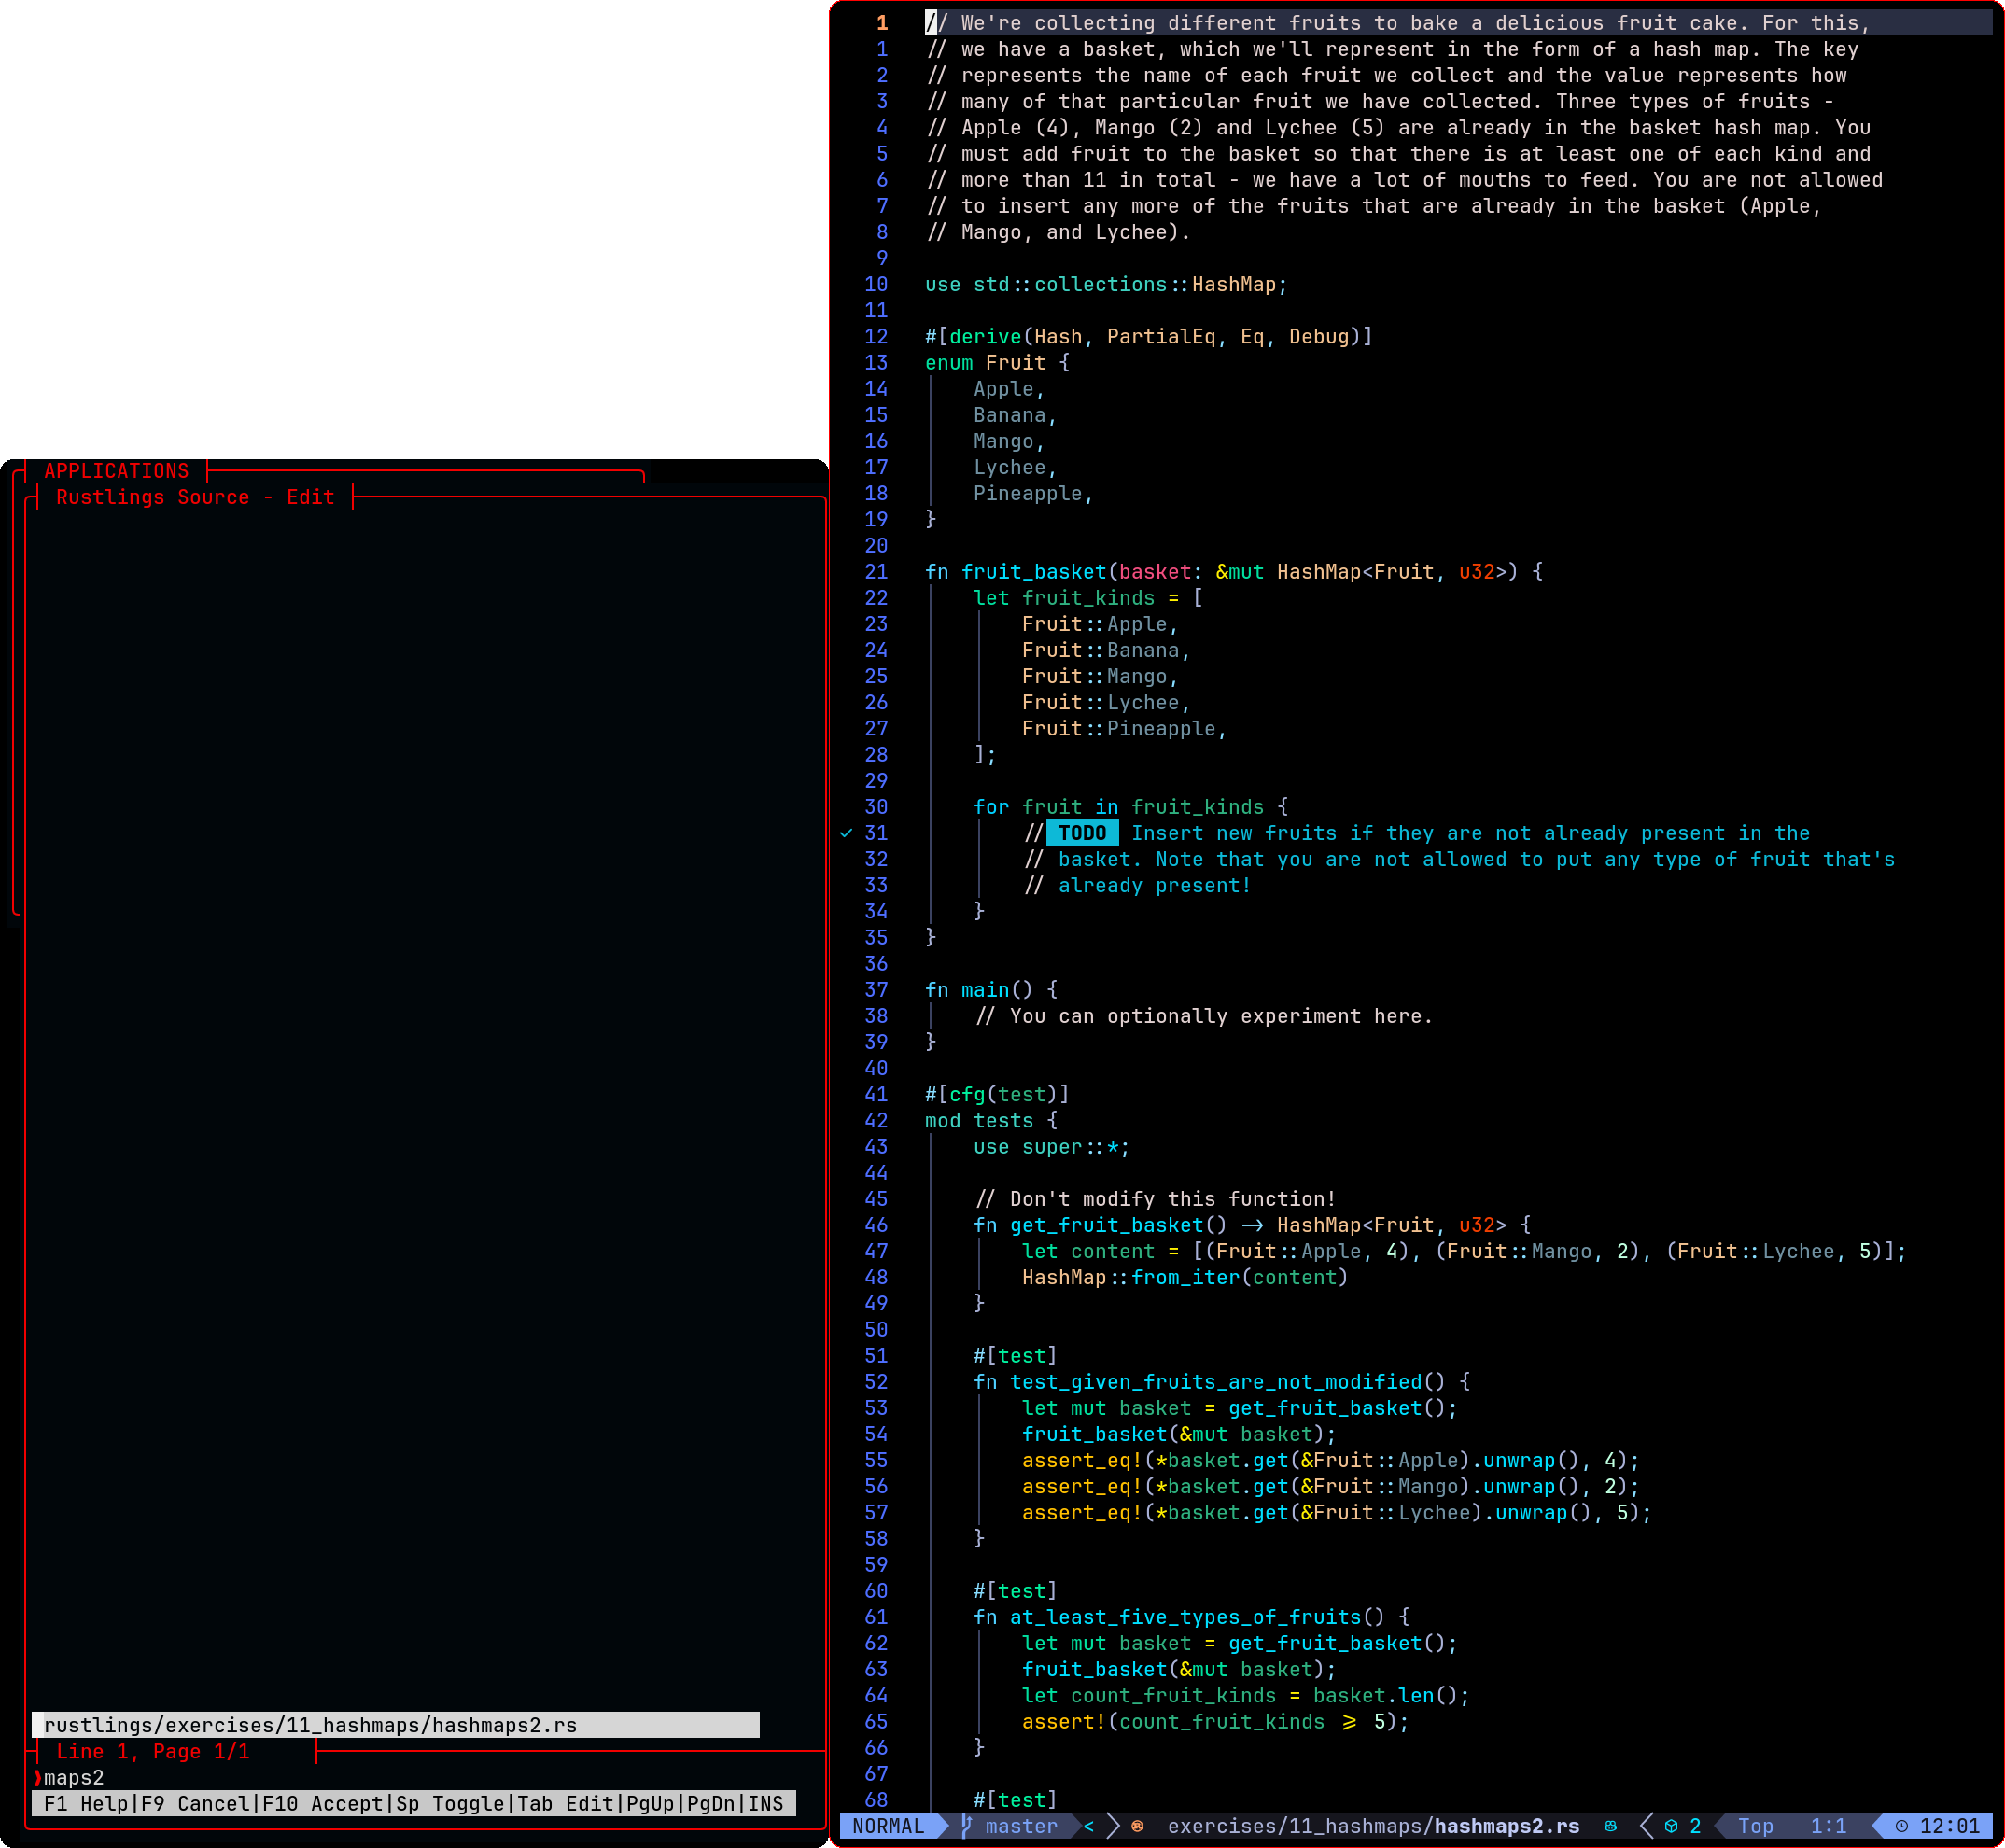
Edit the Rustlings source file to correct the compiler errors and save it.
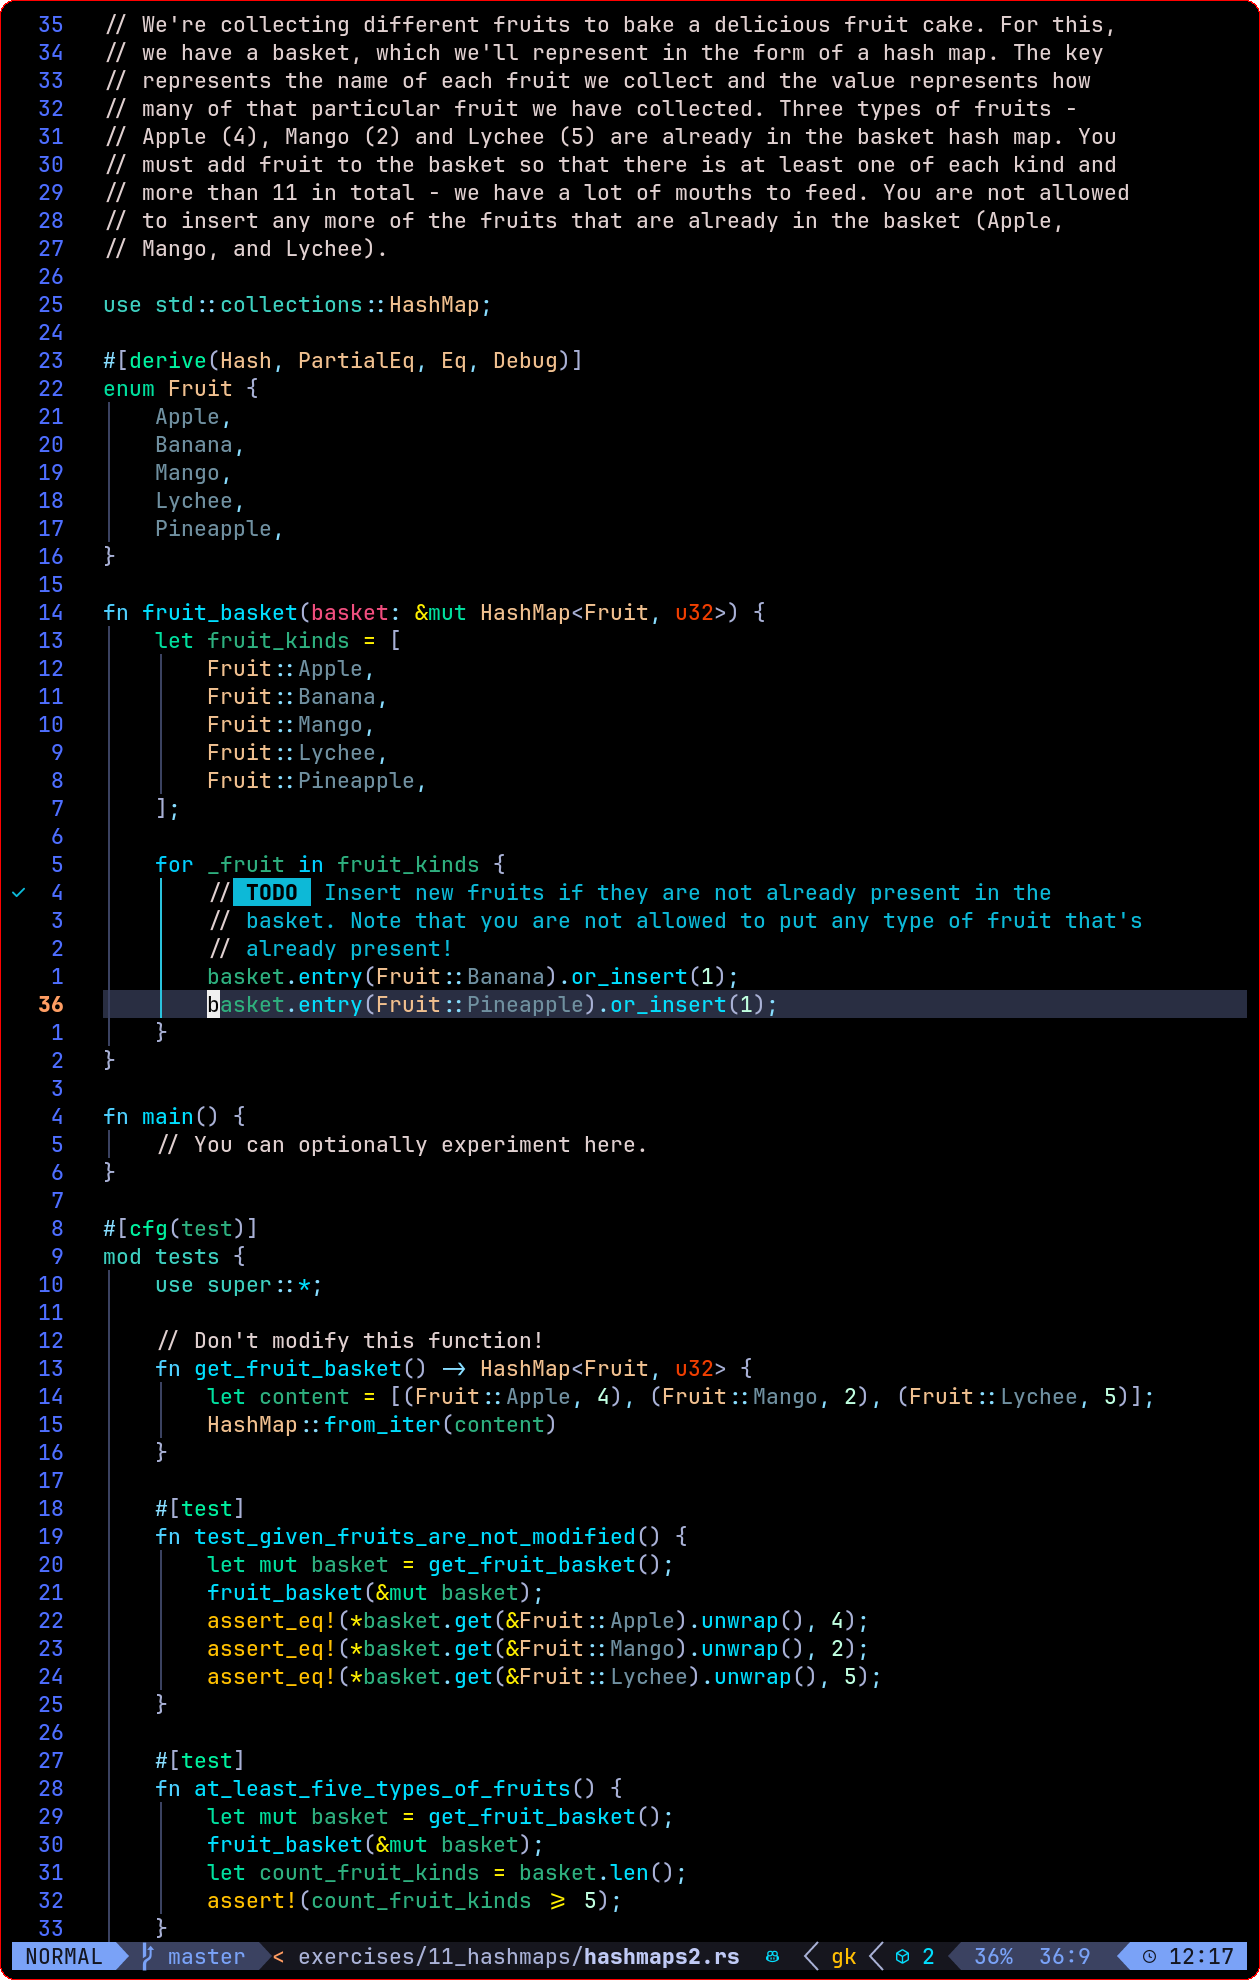
When you save the file, Rustlings will automatically check your work.
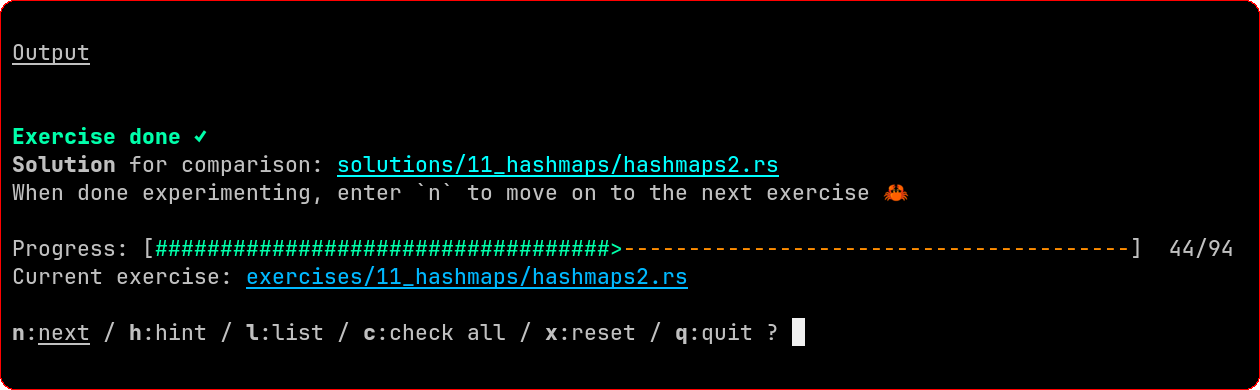
If you were successful, you can press "n" in the Rustlings terminal to advance to the next exercise.
Then, repeat the process of selecting the Rustlings Source option in C-Menu and editing the next exercise.
If the line editor refuses to accept a typed character, it is probably because of the preemptive error checking. If the character you are trying to enter would result in no matches, the line editor will reject it.
🐸 Enjoy using C-Menu! If you encounter any issues or have questions, feel free to open an issue on the C-Menu GitHub repository
 1.17.0